

Ravemen Lights: Quick Review Part 2 – by Guitar Ted
Note: Riding Gravel purchased a suite of Ravemen lights to test and review. This review is being broken up into three parts to give these lights a fair shake. Please look at the other two Quick Reviews on the Ravemen lights for more. Links will follow at the end of each review. Thanks!
The Ravemen Lights introductory post introduced you to the range of lighting we chose to feature in these Quick Reviews. Check that post out for all of the technical features of each Ravemen light we will be featuring here.
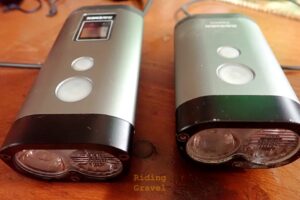
This segment of the review of the Ravemen lights we have will feature two lights that I consider to be right in the thick of things when it comes to power, features, and price. This is a very competitive price point and power range where many riders go for a decent amount of power and a smaller form factor in a package that gives you something in terms of options. That is why I chose to take a look at the Ravemen PR800 front light and the Ravemen TR30M tail light. Let’s see how these two lights stack up.
Ride Performance: I started out riding with the PR800 and experienced a bit of bad luck out of the gate when I had the light unit fly off my handle bar due to my not getting it completely into its mount. The light flew up about six feet into the air at about 12 mph and came crashing and skidding to a halt on cement and gravel. I figured that the light would be toast, but fortunately it was not damaged beyond some cosmetic scuffing and it has worked well ever since that time. While I would not recommend that you biff your light unit on cement, it is somewhat comforting to know that the Ravemen light is built well and seems pretty tough.
Now with that out of the way, I can say that this light is somewhat similar to the larger, more powerful PR1600 I reviewed in Part 1 of this series. Like the PR1600, you get a low and a high beam, a few levels of light, a remote switch, albeit a wired one, and the mounting cleat is identical to the PR1600’s, although the thumbscrew mount is different. Actually, I preferred this mount as it is much more versatile. It can be made to fit a wider range of bars than the PR1600’s.
You can still charge other devices from the PR800, and can you charge it while riding, but only at the low power setting. The remote, when used, is wired to the charging port and there is one button that takes you from wherever you are on the light menu to the highest setting and then back again. You can still toggle through the settings remotely, as you can with the PR1600. There is no LED readout screen here though, so a color-coded button on the unit goes from white-ish, to green, to a red as the battery gets depleted. Also- obviously – the PR800 is less powerful and has less modes than the PR1600. But all of that may actually be attractive as it is easier to understand and, simplicity seems to lead to less to go wrong down the road.
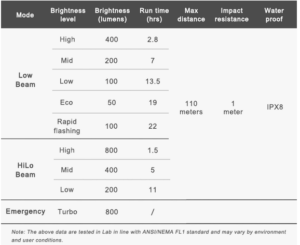
I was torn while using the PR800 between which mode I wanted to have as a ‘base’ mode. It has a Medium power mode on the Low range (one lens being used) of 7 hours, but if you toggle to High range, (both lenses running) you get a bit more power (400 Lumens vs 200) but run time drops to 5 hours. I ended up going with the latter. It should be mentioned that you don’t get the full-on 800 Lumens unless you go to “Turbo” mode which depletes the battery quite quickly. You can reach the Turbo mode by holding the remote button which puts you into Turbo as long as the button is depressed. You also can get into that mode by briefly depressing the power button when the unit is on and it will stay in that mode for 1.5 hours (Claimed) Once in High range you have three choices, and I liked the Medium power mode best here.
Just as with the PR1600, the light color and spread was very useful, but the throw down the road was not as impressive as with the PR1600. That wasn’t a really big deal to me as speeds typical for night riding were well within the PR800’s capabilities on the modes I used. While this Ravemen light probably isn’t as good as the PR1600 for MTB or severe terrain, it is perfect for gravel roads.
I should also note that the Power button was a bit finicky to get the light started up. I had to hold it down for a good three to five seconds and do that ‘just so‘. But again, as I stated, I did drop this unit pretty hard onto concrete, so that may have contributed to this issue.
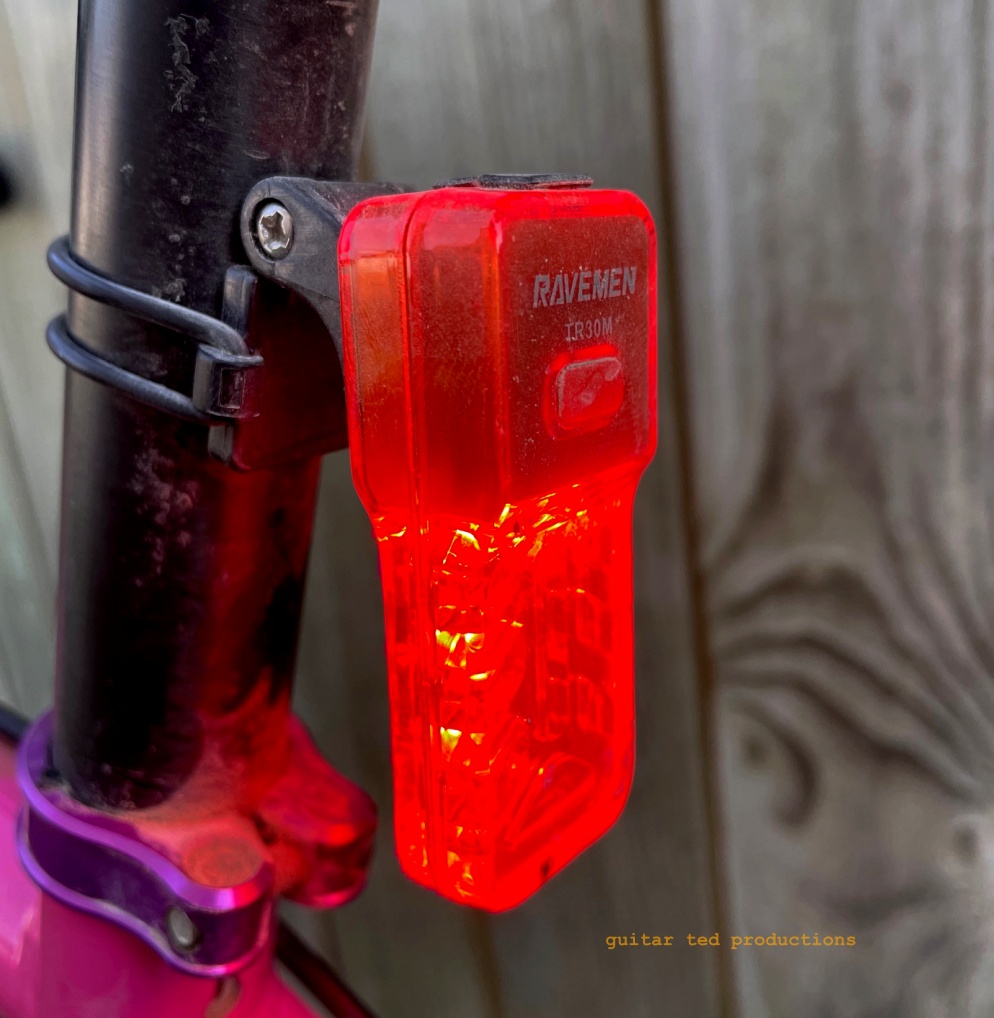
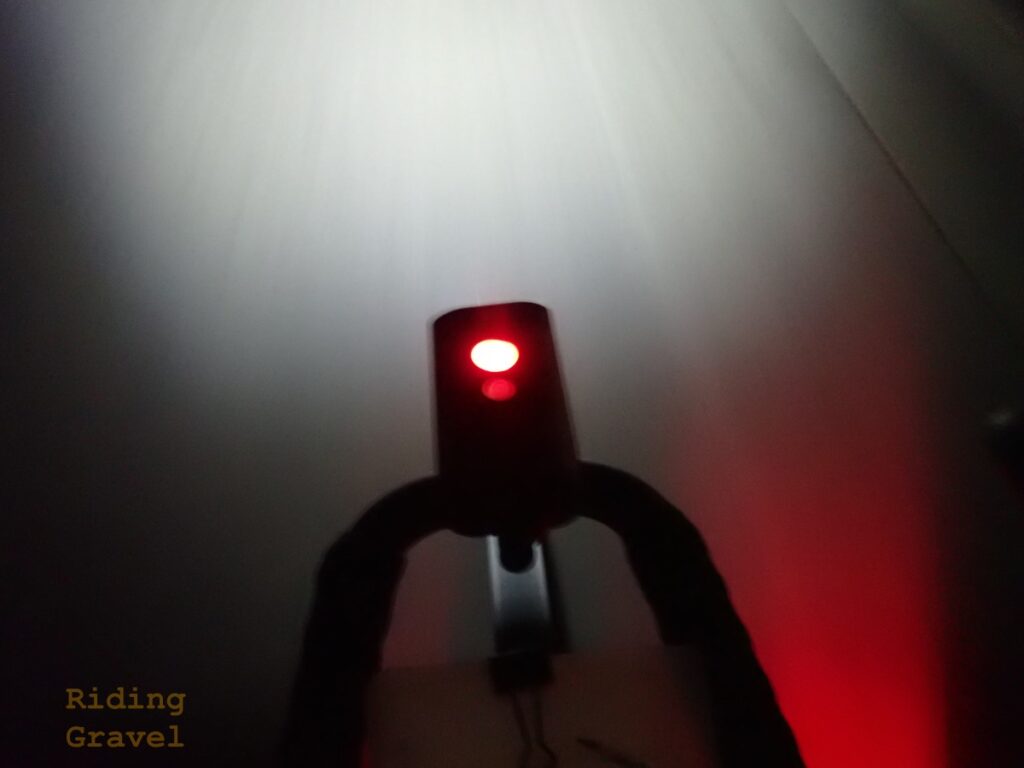
Ravemen TR30M Rear Light: This rear light was probably my favorite of those we chose to test out. It is unique in that it has a clear housing which allows its LED emitters to shine in a 360° pattern. It also features a mount which allows you to position the light in a horizontal to the ground position (maximum visibility) or in a more vertical orientation for less ‘dazzle’ to following vehicles or riders. Maximum output is 30Lumens, but to my eyes, this seems to be less descriptive of the impact this light has while in use.
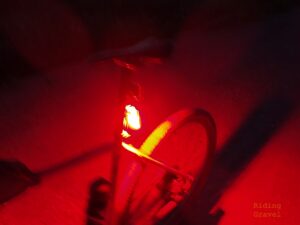
The way Ravemen designed the casing, it has a dispersal of light which floods the immediate area around the rider with a red glow. This, in my opinion, is much more noticeable to other vehicles because it gives eyeballs a bigger target to focus on with less of a ‘brilliant dazzle’ which can be a bit disconcerting and less easy to focus on. Anyway, this is a very unique tail light and one I would reach for first when considering rides in traffic, for night time commutes, or for anytime I want to get noticed.
I also found that since the light tends to be more f a flood pattern, you can actually use it to see by when grabbing things out of a rear bag, or for when you want to inspect your bike for any reason at night. Sure, a white light is better, but since this light works like it does, you really don’t have to remove your head unit to see many things if you have a TR30M on the back. Of course, this may also be an annoyance. I could see the shadow of my legs in a red glow ahead of my bike while riding with this unit! So, it may not be for everyone.
I was not impressed with one facet of this tail light, however, and that had to do with the mount. Its success is predicated on the sole “O” ring used to attach it to a seat post or chain stay. While I’ve seen and used other mounts which employed “O” ring type mounts, this rubber hoop which came with the TR30M ( An “O” ring comes with other Ravemen tail lights as well ), is less than confidence inspiring. In fact, it doesn’t even hold the light on tight enough that it can’t be rattled by harder impacts. While it has held up for months since I’ve been using the tail light, I would have liked to have seen a more robust mount with a part I can’t lose, like an “O” ring, when I remove the light.
At The Finish: The PR800 is a great light with features that make it a bit more versatile and useful for the long distance cyclist. The remote switch is great, albeit wired, and allows you to hit the brights when needed without losing a grip on the bars. The build quality seems robust, especially considering my unintentional drop test. I liked the light quality and the light’s throw for gravel roads, but some folks who are looking for more punch and brighter light levels may want to move up the Ravemen range from this unit.
The TR30M tail light is really unique and a favorite of mine now. I’d be hard pressed to find a more ‘noticeable’ rear light for traffic situations, that’s for sure. I just wish Ravemen would consider a more robust mount for this light. Without that, it misses the mark a bit for me. Maybe I’ll fab up something on my own, since otherwise this is a great unit.
The first “Quick Review” on Ravemen lights can be found by clicking on THIS LINK.
For more on Ravemen Lights see their website here: http://www.ravemen.com/
Riding Gravel purchased the Ravemen lights on test and review here for a discounted price from a distributor. We are not being paid, nor bribed for this review, and we always strive to give our honest thoughts and views throughout.


1 thought on “Ravemen Lights: Quick Review Part 2”