

Time For Tubeless Maintenance – by Guitar Ted
Spring has sprung in the Northern Hemisphere and that means bicycles are being brought out for the season. many of our readers are using tubeless tires on their gravel going bicycles and we thought we’d pass along some tubeless maintenance tips to help you out to get the best experiences this Spring.
Like the rest of your bicycle, tubeless tires are something that needs attention from you from time to time. There are several reasons for this. Probably the most important being that sealant inside the tire will dry up and become ineffective over a period of time. If you haven’t been riding for several months on your gravel bike, or if you’ve never checked those tubeless tires, this is reason #1 to check out this article.
Tubeless tire set ups also need attention to other facets of the system also. Valves can get clogged, valve core seals can degrade, and the tubeless tape on the rim can be compromised over time. So, this article will walk you through the reasons for doing tubeless tire maintenance and how to accomplish it for the best results and a worry-free tubeless tire set up.
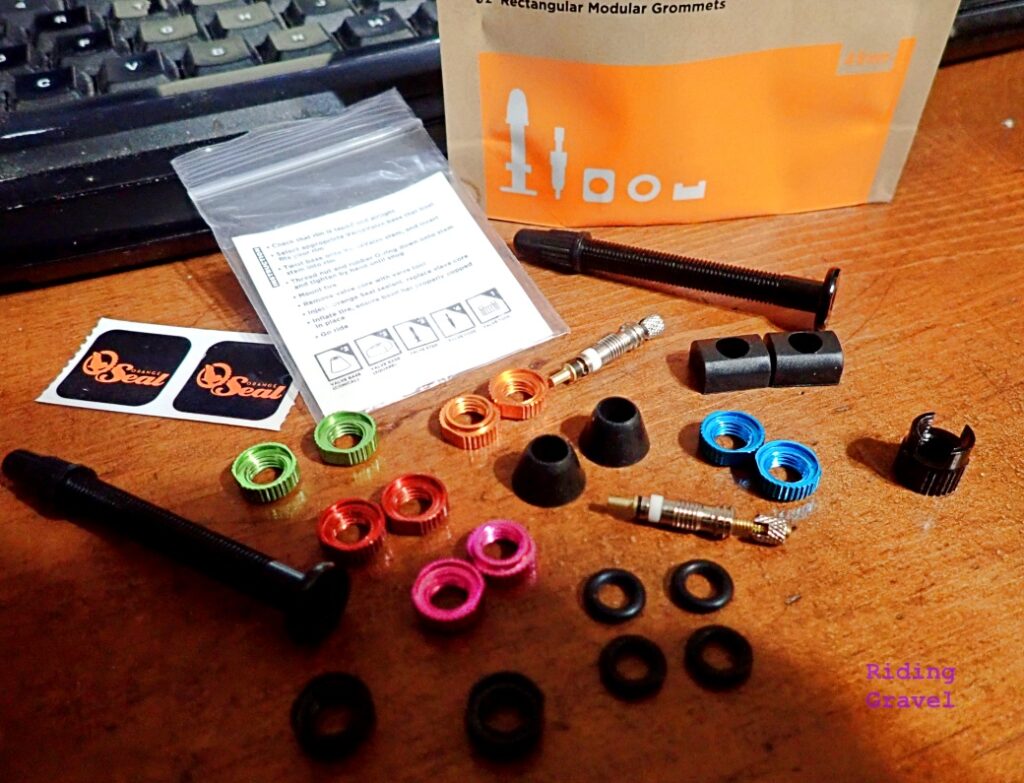
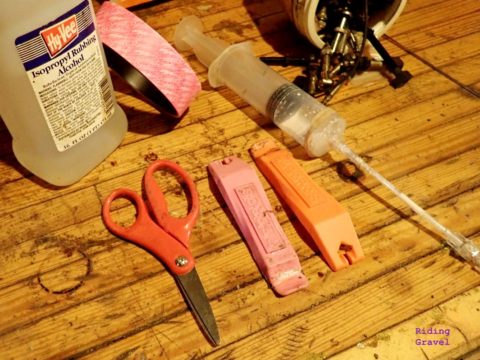
What You Need: To get started, you’ll want to get your parts, pieces, and tools readied. Here’s a few things we’re going to use: We were set up by our friends at Orange Seal with valves as they sent along some of their VersaValve packets. We’ll also be using Muc-Off tubeless tape and sealant. You can use whatever brands suit you, but you definitely want to have new valves and tape at hand. beyond that you’ll need the following items;
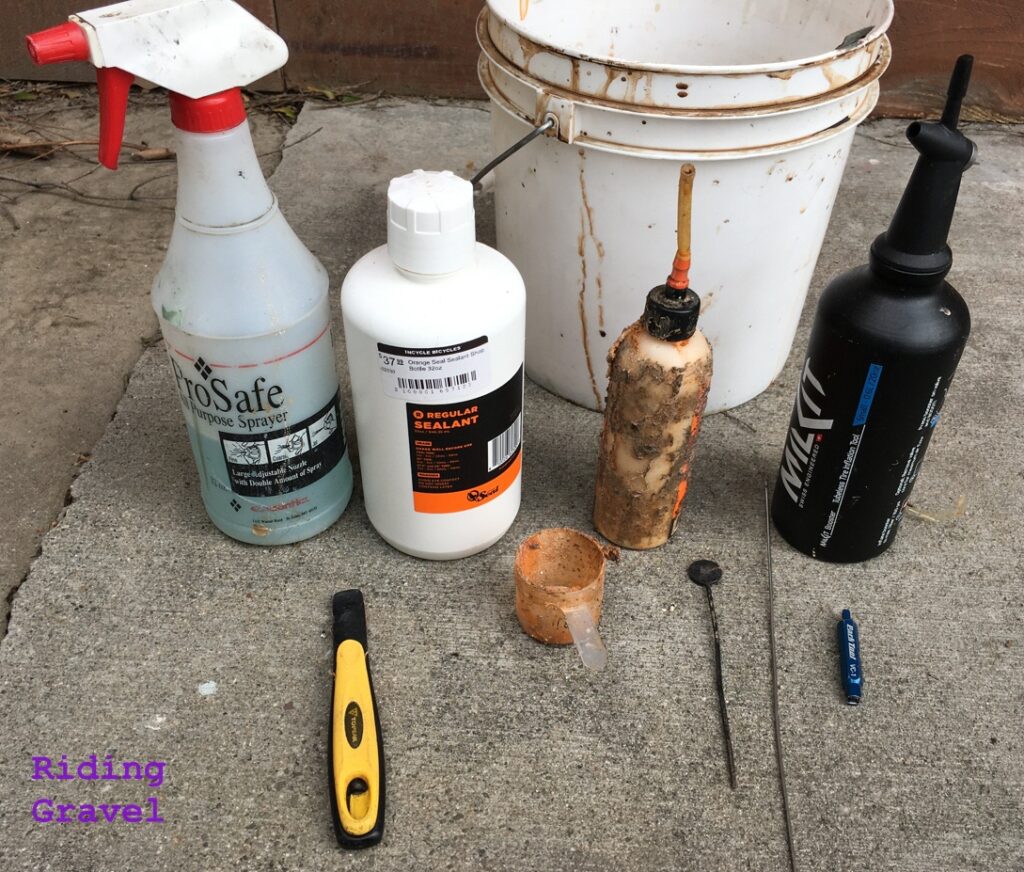
- Alcohol cleaner
- Rags
- Scissors
- Tubeless syringe (We like KOM’s product you can get here)
- Valve core removal tool (Another KOM product we like)
- New tubeless valves/cores (We recommend Orange Seal VersaValves)
- Tire Levers
- Nitrile gloves
- Safety glasses
- Bucket
- Water source
- Stiff brush
- Air source (High volume pump, compressor, or the like)
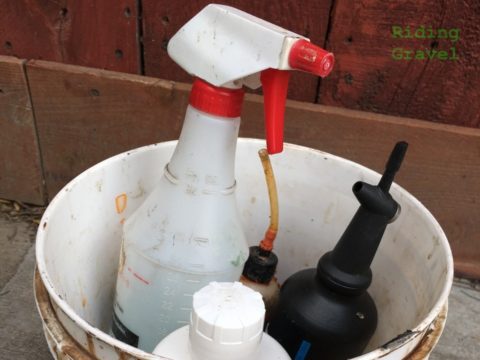
- Spray Bottle w/soapy water
You also will want to do this task in an area where you can easily clean the floor, or where you do bicycle maintenance, (garage, basement, shed, etc) since tubeless sealant goop spillage and a bit of slopping about is a possibility. Okay, so now let’s get on with the task and I’ll share why these steps have proven to be important for me in the many years I’ve been using tubeless tires.
Step #1: Tire Removal: Remove the wheel from the bicycle. (Don’t forget to put a brake chock in the caliper if your brakes are hydraulic!) Then let the majority of air out of your tire by depressing the valve (Presta requires you manually open the valve) with your finger or in the case of Schrader valves, use the corner of a tire lever to depress the valve core. Once most of the air is out, you can then remove the valve core with the tool you have for that. The reason you don’t want to remove the core right off the bat is due to the possibility of clogging the valve with sealant. That would just add an unnecessary step to our maintenance.
Now with the wheel held at about 11:00 o’clock and 1;00 o’clock, use your thumbs to press the bead of the tire away from the bead seat of the rim. This may be tough to do, so be patient. Once you’ve broken the bead away, then continue to press the bead away from the bead seat of the rim inwards all the way around the rim. Repeat for the opposite side of the tire. Be careful! You may spill sealant if you have a lot of sealant in the tire. Then when you’ve accomplished this, take a tire lever and lever over and peel off the tire, again being careful not to spill sealant in the process. Repeat for the other side of the tire until it has been separated from the rim completely.
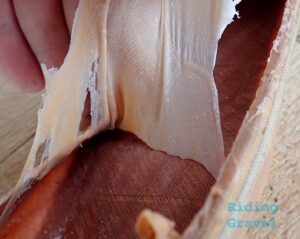
Step #2: Inspection & Cleaning: Now it is time to check things out. If you have a puddle of sealant left, you can hang the tire for about 15 minutes to allow all the sealant to pool in one place, then you can use the sealant injector to ‘hoover’ it out to measure what is left. You won’t get all of it out, so don’t sweat the last little bit. Now setting that aside, wipe the excess sealant out with a wet rag, using water you’ve placed in a bucket. Wash out the tire’s inner surface as best possible. You may have sealant that peels off, (Orange Seal and Muc-Off sealants typically come off this way) so you may want to peel off as much as you can with your hands. Or you can use the stiff brush to scrub it out as well. You don’t have to make it 100% clean, but do concentrate on the bead as this is a critical part of the tubeless set up. Any dried or clumped up sealant in this area should be removed for the best possible results.
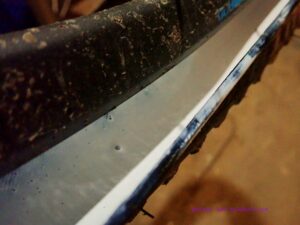
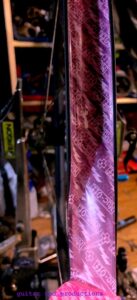
Then you will want to inspect your rim tape and valve. First, remove the old valve from the rim. Set that aside for now. If you haven’t replaced it in a while, now is the time to do that. Especially if you have swapped out tires once, because it is easy to disturb the edges of the tape when dismounting/mounting tires and that little bit of tape being lifted any amount is a pathway for a future leak to occur. Also, air pressure tends to push tubeless tape downward into spoke holes and eventually tape will fail by splitting out at those spots. If your tape is indented at the spoke holes, it is time to re-tape. It’s not worth the risk to allow things like that to go, so just plan on applying new tape now and be secure in the knowledge that you have a fresh and solid tape job underneath you when you are riding this Spring and Summer.
Step #3: Applying New Tape And Installing New Valves: Peel the old tape off and do not use a knife, screwdriver, or other metal object as any accidental deformation of the inner rim well by way of scratches and gouges will not allow a good seal between the rim well and the tape. Use an alcohol soaked rag to wipe up residue and make sure the inner rim well is free from debris and any dirt and grease/oils. Then apply the tape by stretching it a bit, being careful to align the tape centrally in the rim well. Take time to work out trapped air bubbles under the tape as you go. I recommend two rounds of tape, as this allows the tape to have more resistance to being pushed down into spoke holes and potentially failing.
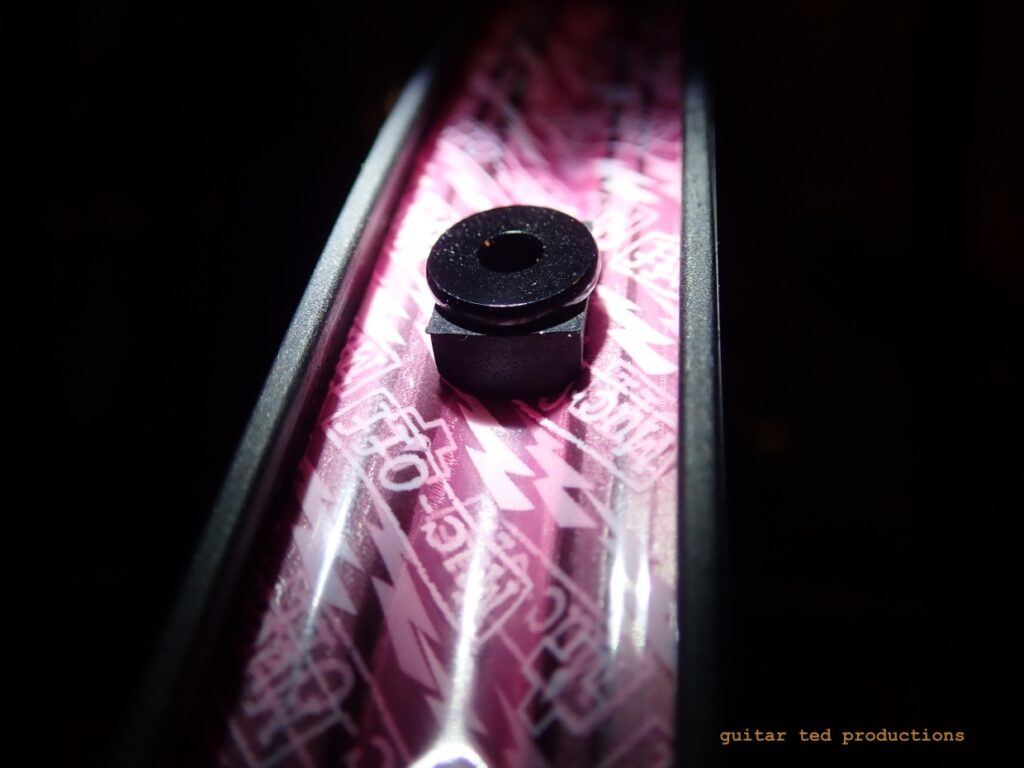
Now inspect the valve and take out the valve core, if you haven’t already. If the valve is coated on the inside with sealant you can clean it out, but I generally just replace these when they get partially clogged as the sealant can start to corrode the valve and they can easily be broken or clogged up again if they don’t get replaced. Valve cores are more often replaced since the plastic or rubber seals can be deformed, broken down by sealant, or perhaps are damaged from being tightened down too tightly. I almost always, as a rule, just replace a valve core every time I put in new sealant these days. It is worth the extra minimal cost and peace of mind. Plus, kits like the VersaValve kit have extra valve cores expressly for this purpose.
Now installing a new valve stem is pretty easy. Make sure you identify the valve hole drilling and make a small slit with a knife or push a sharp pointed awl or the like into the place in the tape above that hole. Then thread/push through the new valve and affix the nut on the outside of the rim on the threaded part of the valve stem. NOTE: The VersaValve kit comes with various rubber inner rim well bits that fit over the valve stem before you insert the valve into the rim. make sure you choose the appropriate one that best fits your rim’s inner profile. The kit also has “O” rings which fit with the chosen color of Presta valve nut to help seal from the outside as well.
Step #4: Remount The Tire, (or Mount a New Tire): Now it is time to remount that cleaned up tire, or install a new one if desired. Try the technique of placing the rim inside the tire casing which leaves both tire beads outside the rim. Then work a bead over the rim starting at the valve, making sure the bead sits between the valve head inside the rim and the edge of the rim itself. Go all the way round one side until one bead is inside the rim well. Then start with the opposite tire bead at the valve as you did on the first bead. Working the bead over with your hands, you can stop at the point where about two to three inches is left to go. This is where I like to add in my sealant.
You can re-use the sealant you drew out of an old tire and add some new, but if your old sealant has been in their several months, it is best to discard it responsibly and then just add in new sealant to the recommended levels. This can be accomplished, either way you go, by using the sealant injector which, if you use one like the KOM injector, has markings to reference so you get the proper amount in. Most manufacturers and brands call out for anything from 50ml to 100ml for most gravel bike tires. I like to err on the high side myself, so I generally put in about 100ml per tire measuring 42mm-45mm in width. After injecting the sealant you can pop over the last bit of tire bead.
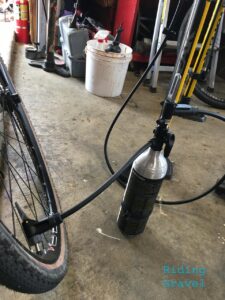
Now, airing up the tire should be done with the valve core out, and a short blast from an air compressor should be successful every time. (For a good look at air sources for home use, see Grannygear’s post here) In rarer cases a floor pump will work. You can also use various tubeless tire floor pumps or pressurized tank systems for this job as well. Once the tire is properly seated, (NOTE- This may take a bit more pressure than you typically run), then it is a wise thing to bounce the tire while holding the wheel nearly parallel with the ground. Rotating the tire while bouncing the wheel will evenly distribute sealant inside the casing of the tire. This will aid in sealing the casing and any small leaks that may be occurring within the system along the tire bead. It is also recommended to take a short 15-20 minute ride if possible.
Check the tire in 24 hours to see if it is flat, (hopefully not!) or if it has lost any air. A final check at this point could include a spray with a solution of dish soap and water to help pinpoint any leakage. If you see small foamy ‘clouds’ of bubbles coming from any point along the bead, make sure the tire is seated fully into the rim at that point. Sometimes you;ll find the valve stem leaking. Here you can double check that you have the core tightened, or the outer Presta Valve nut tightened.
If you managed the tape and valve installation correctly, you can eliminate any internal issue if you have leakage. This is why I like replacing vales, tape, and sealant when I do a tubeless maintenance. It isn’t worth the headache if you try to get by with reusing things. The tubeless ‘dance’ isn’t hard to do once you get the hang of it. That said- it isn’t for everybody. Using tubes is definitely a lot easier and comes with less maintenance issues. Of course, they do fail when punctured. There is no free lunch. You’ll just have to decide which suits you better, and if all this maintenance is worth the benefits for your riding.
NOTE: Thanks to Orange Seal for providing the VersaValve kit used for this post.


I am going to set up my bike with tubeless tires soon, and in reading about how it works there is one thing I can never really wrap my head around. If I remove the valve core and inflate the tire, what happens when I pull the pump off of the valve stem? I imagine the tire losing it’s seat and the sealant pouring out through the valve stem… but this must not happen. Is one able to pull the pump off, reinsert the core, and reinflate the tire without losing the tire to rim seal and all the sealant?
Maybe this is one of those things that makes more sense when doing than while contemplating!
My experience is that for most tires once they are seated they stay seated you until you beak the seal as laid out in step one. Personally I seat the tire without sealant and then put the sealant in through the valve with a KOM injector. Then I put the core in and pump it up with a regular pump.
@Jason MacArtur, @ Adrian – Jason, what Adrian says is pretty much standard practice. I typically do not let all the air out and try to stick in the core before all the air comes back out, but that’s just me. Also, doing this the way Adrian tells you he does it is another good way to do it.
As with most things, there can be more than one way to skin a cat.
Anyone played with Cushcore? I’ve been running schwable marathon mondials with Cushcore and I gotta say they are a dream even on gravel.
@Eli Sykes – Yes, I’ve seen the product and Grannygear has it out in SoCal. My opinion- I don’t see the question this product answers where I ride. Your mileage may vary.
I use Orange Seal and I have trouble removing the old sealant from the bead. I have tried soap and water and alcohol and nothing seems to remove it easily. Does anyone know of a rotating wheel that would help with this but not damage the tire?
Sean,