

WTB Proterra Wheels: At The Finish – by Guitar Ted
The value oriented, upgrade wheel set from WTB, the Proterra wheels, are now at the end of the review cycle. We’ve covered the technical aspects of these $649.00 wheels here, and I gave you some impressions concerning their performance in my next update after that, and now it is time to wrap it all up. What are the characteristics of these wheels that may make them worthwhile to you? Anything not so great? This is the post where you will get my take on those things.
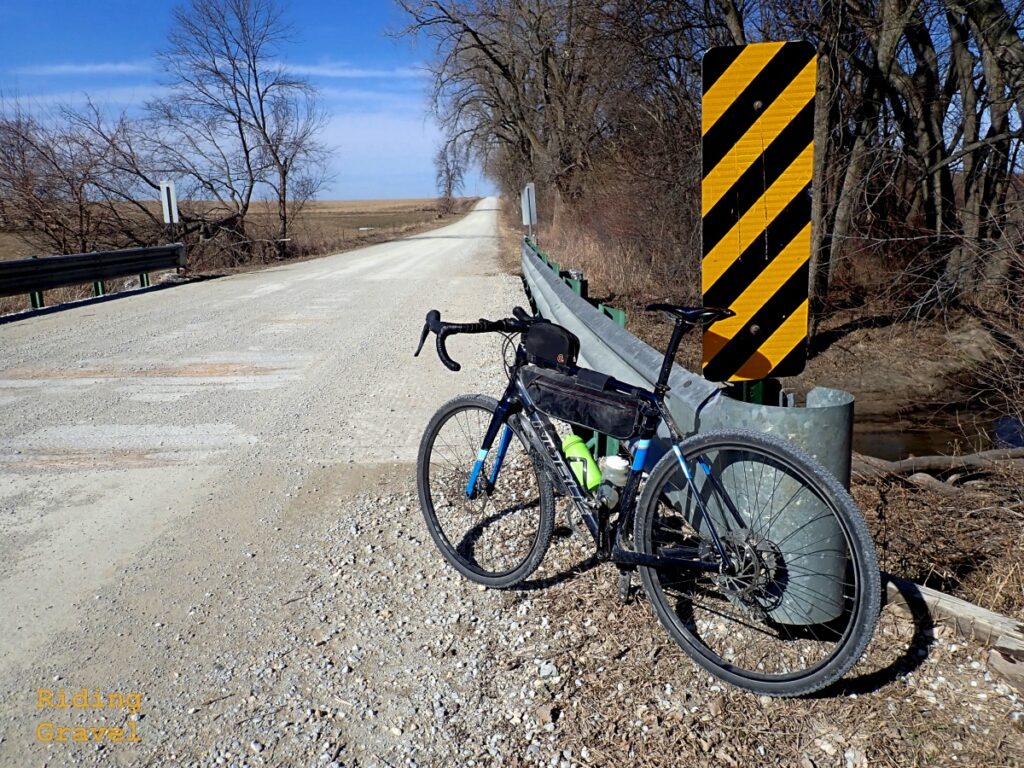
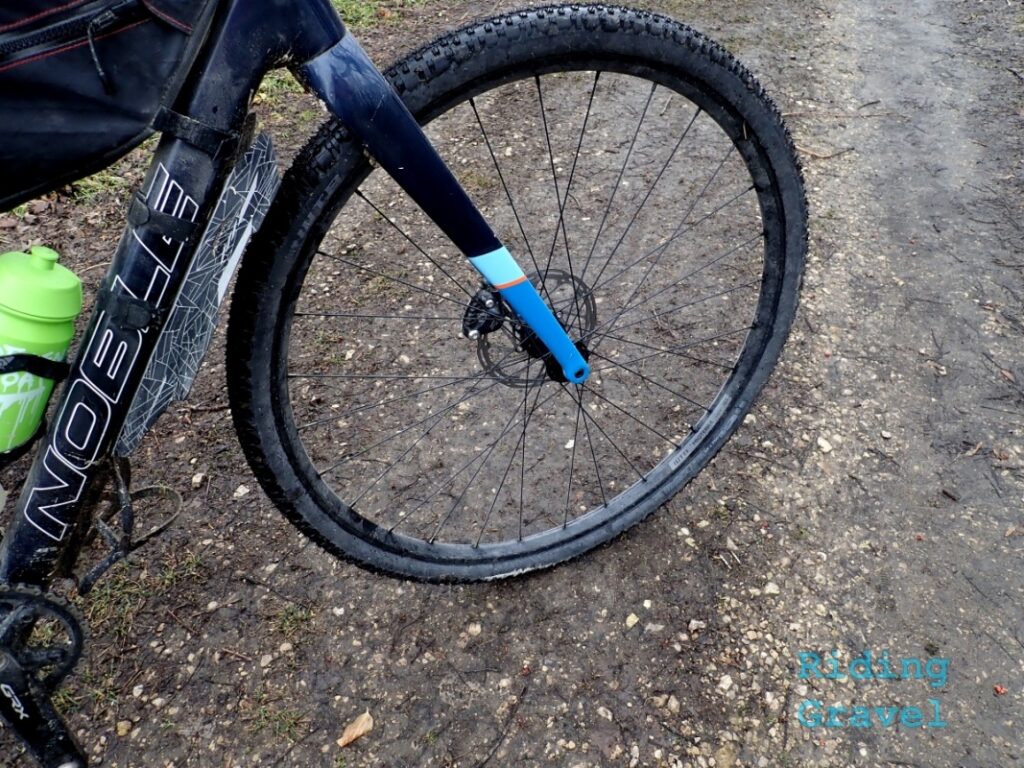
Ride Performance: Since my last update I have had a lot more opportunities to ride the Proterra wheels in rough, loose crushed rock where any deficiencies in lateral stiffness can hinder ride performance. (See the “Checkpoint” post for a better understanding of what I am talking about there.) I have to say that upon further review, these Proterra wheels are probably some of the stiffest wheels with aluminum rims that I have ridden. That isn’t to say that they are completely void of any negatives there. The one thing a carbon rim can do is that it can damp down a lot of the higher frequency ‘buzz’ that vibrates through an aluminum rim. The Proterra wheels still zing your hands a bit due to their having the aluminum rims, but in terms of handling? They are at, or very nearly at, the top of the heap in terms of holding a line in deeper crushed rock.
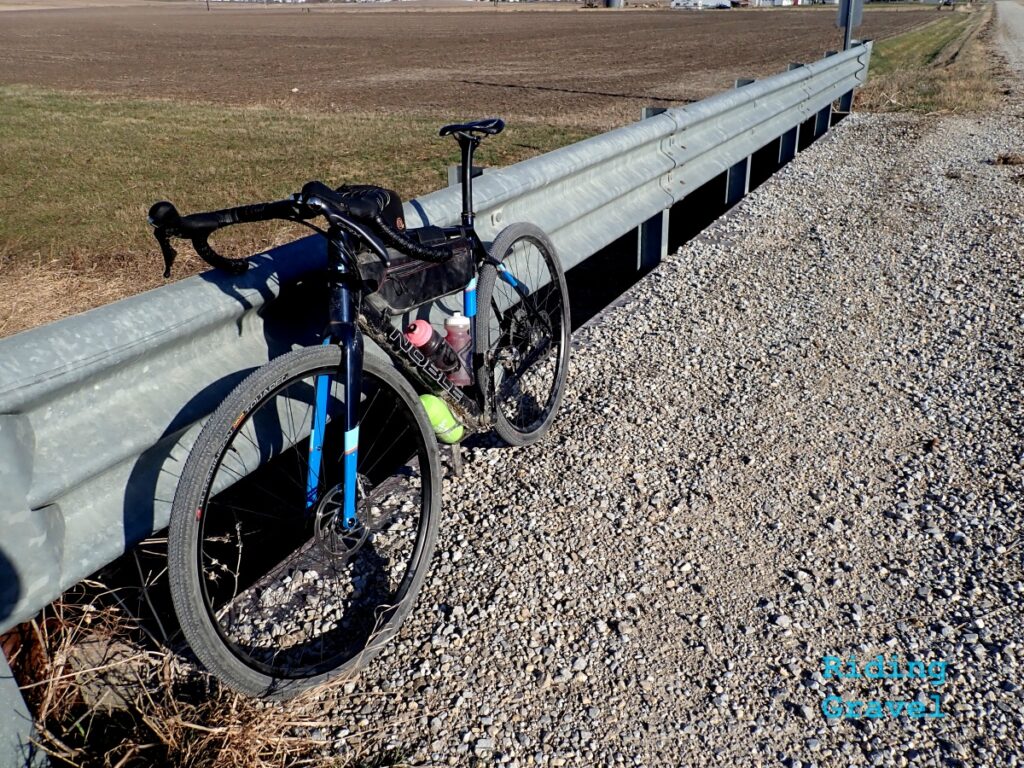
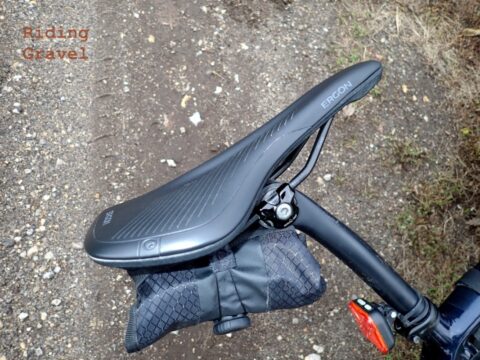
The SG2 Resolute Tires were removed for this final stage of the testing and I replaced those with the pair of Hutchinson Touareg tires which we reviewed last year. The mounting was typically tight and the tires aired up with a floor pump. I did note that one of the Proterra valve stems was loose. This may have been why I noted that one of the Resolute tires kept going down over a period of a couple of days. You might remember that I had found a loose valve stem upon initial installation as well. I cannot fault the WTB provided valve stems here, but I am now a bit suspicious and have kept a watchful eye on those since then.
Otherwise the Hutchinson tires and WTB Proterra rims are working out great. Ride performance is what I expected, and I suspect that many other brands of tires should be compatible with the Proterra wheels. So, if you aren’t a big WTB gravel tire fan, no worries.
A Quick Look Inside: The folks at WTB suggested that I take a moment to show some ‘gut shots’ of the rear hub for you. The intent was to help show how well designed the hub internals are and how they hold up to dust, dirt, and wetter riding conditions. While I didn’t get a ton of wet riding in, I got some, but the dusty riding? Yes, I got plenty of that done. So here we go with a dive into the rear hub of the Proterra rear wheel.
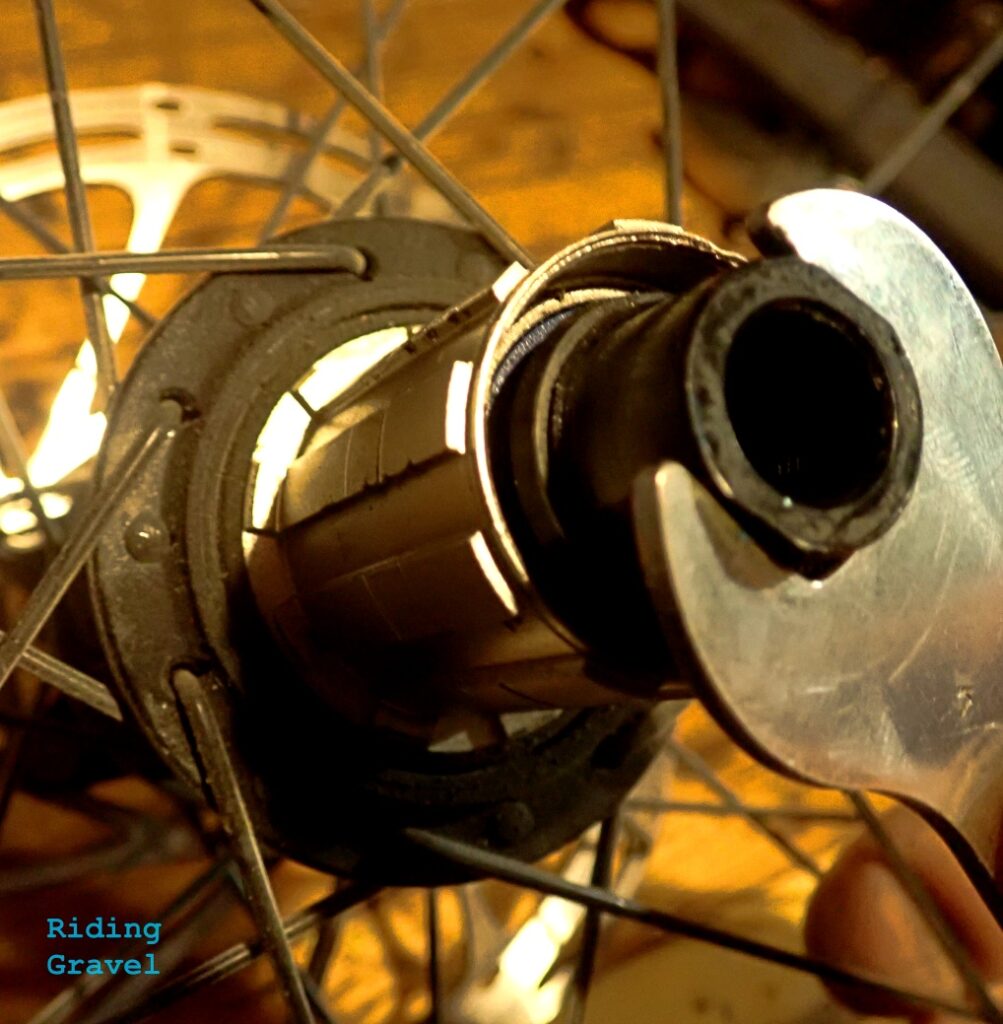
First, you’ll need to remove your cassette. Then, you will need two 15mm cone wrenches, or an axle vise and one 15mm cone wrench. You have to secure the non-drive side so that end of the axle doesn’t spin. The drive side wrench then spins off the end cap in a counter-clockwise rotation. Once you remove that end cap, the free hub slides outward on the axle to remove it.
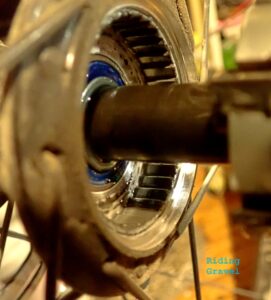
Here we get to see the internals. the hub pawls and the drive ring pressed into the hub. We can also see the rear bearing here. I found everything to be pretty clean, actually. Whatever lubrication WTB’s manufacturer of the hubs is using is a lighter grease, which is important to note here.
If you had need to clear out any contaminated grease then it should be replaced with a lighter viscosity grease as heavier grease would impair the optimum operation of the free hub. Especially in colder weather. In my case here, I saw no reason to do anything, as there was only perhaps a slight discoloration of the grease, which is to be expected after some use. So, I simply buttoned this hub back up and put everything back together.
One thing to note: When replacing the free hub body on the axle you will run into a slight issue with getting the six pawls to slide back into the drive ring. You can wrap a string, or fishing line, around the pawls to depress them. Don’t tie this string off, just hold the ends in your hand. Then when you get the pawls inside the drive ring a little bit, you can pull that string out and then slide the hub all the way on the axle and into the drive ring.
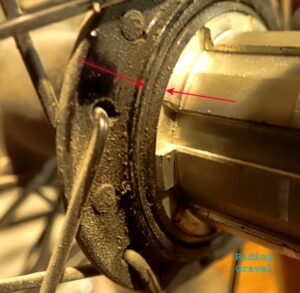
Finally, there is a black plastic seal which helps prevent dust, dirt, and water from intruding into the free hub internals, which must be seated correctly after re-installation of the free hub body. If this seal gets pinched, crushed, or not completely seated, it will impair the free operation of the hub and allow contaminants to get where you do not want them to be.
Since I am a bicycle mechanic by trade, this entire operation from removing the wheel from the bike to reinstalling it in the bike took all of ten minutes. I would suggest that it may take the average, mechanically inclined person a bit longer, but the point is that this isn’t that difficult a job if you have the correct tools and feel comfortable doing this. If you do not have the correct tools, if you do not have patience, or just don’t have time, this is a simple job for your bike mechanic. So the good news is that it shouldn’t be a big deal to maintain this hub.
Now, on with the verdict……
At The Finish: As with many products and components we review, the less trouble we have, and the more we don’t really notice the reviewed thing, the better. this was the case with these Proterra wheels. They appear to me to be a wheel that should provide miles and miles of service given you don’t abuse them severely or get into a bit of a crash.
The thing that impressed me most was that this wheel set was laterally stiff and did not exhibit a lot of the ‘oscillation effects’ which can hinder the handling of a bike and negatively affect the rider. This quality is rarer with an aluminum rimmed wheel set. What this indicates to me is that the individual components that make up this wheel are of high quality- The rim being perhaps the main component here which can be a weak link in a wheel build. The spokes were evenly tensioned, which tells me that the folks building these in WTB’s California wheel building facility are taking care to lace these wheels up well. The hubs seem very well designed and should provide a long service life to their owner. Add it all up and you have a big improvement over what comes stock on most sub-$2500.00 gravel bikes.
And that’s really the point, isn’t it? The Proterra line of wheels is not necessarily going to be your lightest choice, nor will it impress your mates at the group ride, but the Proterra wheels will serve a rider well and be an improvement in many cases over stock wheels. I can see these as being the mile-munching training wheels you use up until you swap out for the fancier wheels on the day of an event. I can see these as wheels you upgrade to which you ‘just ride’ and not give much thought to. In other words, perhaps the perfect wheel set for most people’s needs.
Now, they are not perfect wheels. The inner rim width of our test set is 23mm. Which, yeah…….that’s perfectly acceptable, but if you want to run tires in the 43mm-45mm range or slightly wider, that is a bit ‘skinny’ these days. While WTB also offers a Proterra wheel set with a 25mm inner rim width, keep in mind the 23mm inner rim width set on test weighed 1730 grams already. Add a bit more material to spread out that inner rim width, and well, you know what that will do to the overall weight of these wheels.
So, weight and inner rim width is maybe not quite so great here. The free hub is also quite loud as well, so if you are potentially annoyed by such things, you may not be able to live with this wheel set. However; I would not look at this as a weight savings move as much as I would look at these wheels as a ‘quality, peace of mind move‘ if I were to get them. I think the 23mm inner rim width is okay, and as for the loudness of the free hub? Not a big deal to me. I would, however, be put out by a wheel set that didn’t handle well, wasn’t made from quality components, and that may not hold up over the years. This Proterra wheel set is not that wheel set. It is what you might call the perfect wheel set for a no problems future, in terms of wheel performance. That’s something I could definitely live with.
For more on the WTB Proterra i23 wheels see the WTB webpage for them here: https://www.wtb.com/collections/gravel-wheels/products/proterra-light-i23-wheels
Note: WTB sent over the Proterra wheels and a set of SG2 Resolute tires for test and review at no charge to Riding Gravel. We were not paid nor bribed for this review and we always strive to give our honest thoughts and opinions throughout.


How tight should the rear hub end caps be? If I screw the drive side endcap on with my fingers until it barely touches the bearing, then the axel turns roughly. If I back off the end cap by about half a turn, then the axle spins smoothly, but the end cap is loose. The WTB docs say, “For Speedterra/Proterra hubs: tighten the end caps to 30-40 Nm.” Really??! What do you do?
@John Smart – The Proterra wheels have tool-less, removable end caps per the document I am looking at from WTB:
“Proterra and Speedterra hubs utilize
press-on end caps that do not require tools for
installation or removal.”
So, I’m not sure what it is that you have going on there. My advice would be to take the wheel to a bicycle technician so the hub can be diagnosed by someone with experience with repairs and that can look at the part you have in question directly. For anyone to try and diagnose and advise you without actually seeing the part would be a huge handicap. It’s hard to do from a distance and blindly.
Hi Guitar Ted,
Thanks for the response. The wtb docs I’m looking at are here:
https://cdn.shopify.com/s/files/1/0202/9884/files/WTB_2020_Wheel_and_Hub_User_Manual_v7.pdf?v=1635549040
They say that Proterra/Speedterra *front* hubs have press on end caps. But the doc says, “All Serra hubs, as well as Speedterra and Proterra rear hubs, come with threaded end caps.” I know my Speedterra rear hubs have threaded endcaps because I unscrewed them, then I removed the freehub body to get a look at the drive side bearing. I think the only difference between Proterra and Speedterra hubs is the number of pawls 4 v. 6. I was wondering how tight the endcaps on the rear hub should be tightened when reassembling. It sounds like your WTB Proterrra rear hub is different than the one described in the docs I’m looking at.
@John Smart _ Yeah, again, at the risk of repeating myself, you are best served by having the wheel looked at by a professional in-situ. If you want the best possible outcome, this is your best bet.
I know it may sound dismissive, and I understand if you are not satisfied with my answer, however; I have over a quarter century of mechanic/repair experience that leads me to this advice for you.
———
The Proterra wheels have tool-less, removable end caps per the document I am looking at from WTB:
“Proterra and Speedterra hubs utilize
press-on end caps that do not require tools for
installation or removal.”
So, I’m not sure what it is that you have going on there.
—-
Really? In your article above you say,
—-
The free hub is easily removed once you get the end cap of by unthreading it with a 15mm cone wrench.
—-
So, which is it Guitar Ted?
@John Smart – It took me a while to get around to checking on this, so I am sorry for the late reply.
To answer your question, the answer is “Both are correct. it depends upon which wheel you are referring to.”
Rear wheels use a thread on end cap. fronts are tool-free pop-on type. So, I was incorrect in assuming that the rear was a pop-on type.
In reference to the OG poster on this thread, he still needs to see a qualified mechanic. My wheels do not exhibit the description of the problem he is having, so in my opinion, he is best served by seeing a professional who can diagnose the issue in-situ.
I hope that clears this all up.