

Editor’s Note: Grannygear submitted this article about his tubeless set up tools and I (Guitar Ted here) was surprised because I was thinking along the same lines, but had no idea what old Granny was up to. Great minds think alike and all…. So enjoy this article and following on its heels soon will be my tubeless set up tools and procedures.
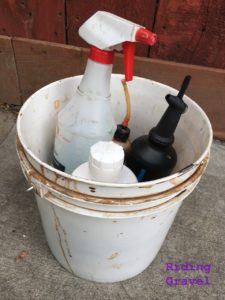
What’s in your bucket?
Back in the ‘old days’, when tubeless was just coming to mountain biking and road and gravel tubeless was not even on the near horizon, things were not exactly straightforward. Getting a wheel and tire to go tubeless was a pretty garage-art level deal and there were secret techniques, incantations, black cats and potions required to get it to work. We learned a new word: Stan’s. Stan’s No Tubes was the industry pioneer in adapting non-tubeless rims and tires to work with a combination of taped over spoke holes and liquid latex sealant. They even had their own rims that were slightly oversized to allow for a tighter fit on a ‘standard’ kevlar beaded tire.
It was a real dance to get all this to work across the spectrum of rim and tire combos and those early adopters (like me) got really good at it. Many were even making their own sealant. (And some of us still do. Stay tuned….)
Now, of course, tubeless is everywhere. Gravel of course, and even road. It’s much better now than the early days, but sometimes you still need to do a good bit of faffing about to get a tire to ‘take’ and set that tire bead. Beyond that, you need to maintain that tubeless system by checking sealant levels, clearing clogged presta valves, etc. Enter the bucket.
This ugly, latex stained, unassuming, white bucket holds what I need to get tubeless done well, and when I add in the inflation options i have at hand, I have yet to have a tire/rim combo defeat me. So let’s see what I have in there.
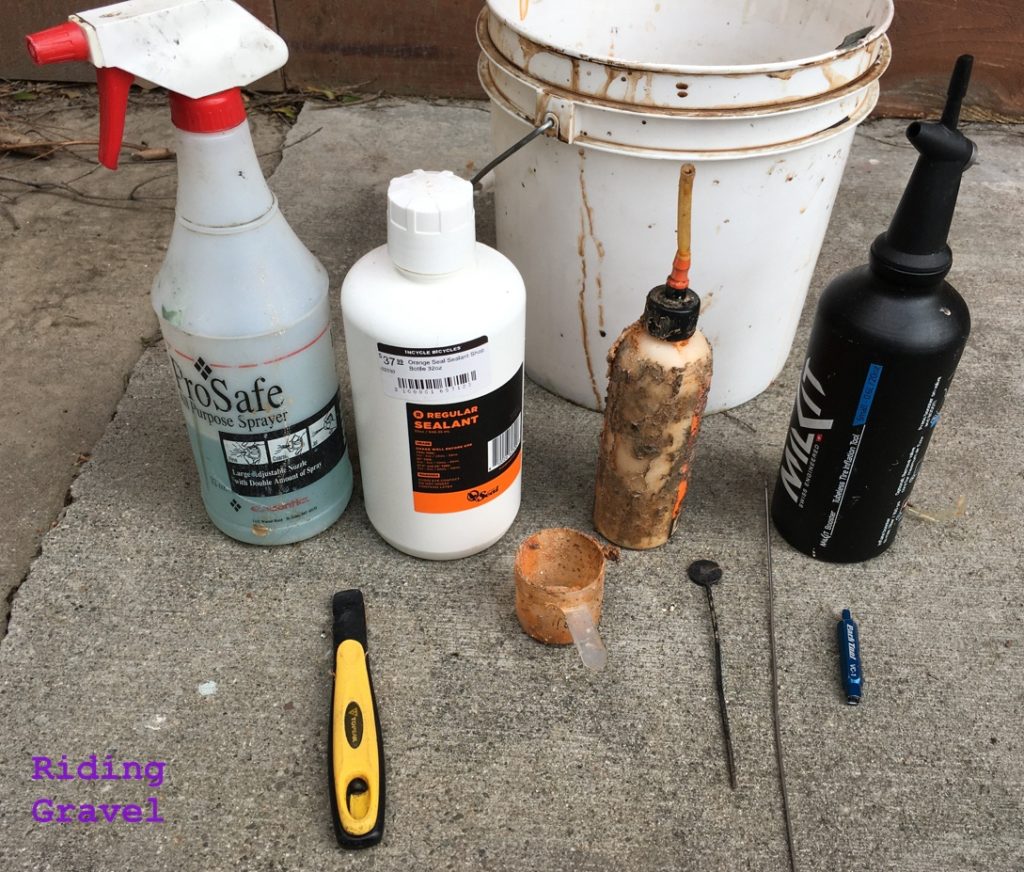
Moving from left to right:
- Spray bottle with a weak solution of Dawn dish soap and water. I use this to spray onto a difficult tire if the bead will not ‘pop’ into place. It also is useful for locating a leak in a tubeless tire or rim, either from damage or a poor installation.
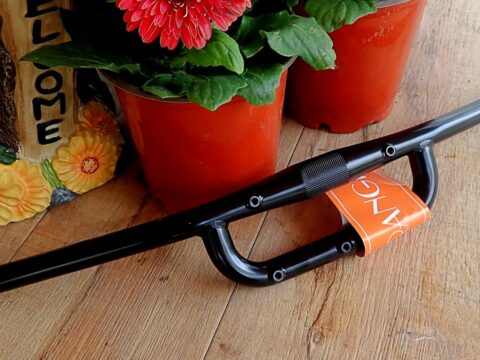
- Moving down is a Topeak Shuttle 1.2 tire lever set. The smaller lever nests into the larger one so you can keep track of them both. The smaller yellow one has a thinner tip and locks into place on a spoke, keeping the tire bead off the rim and allowing for the larger black lever to complete the task of removing the tire. These must be 5 years old? Not sure, but I cannot count how many tires…MTB and gravel…that I have used these levers on. The tips are just now getting a bit blunted and worn, but they have been faithful. I do not use them for road tubeless as the tips are not ‘fine’ enough for that. There the Silca Premio levers get the nod, but for any gravel tires on a wide rim these are ready to go. https://www.topeak.com/us/en/
products/mini-tools/182- shuttle–lever-1.2 - Orange Seal sealant is what I have been using for a couple of years now. I think it is very good, often sealing a tire on a ride well enough to not even know about it until I finish the ride and find dried latex on things. I have had it NOT seal cuts in tires but I also cannot say any other product would have done better.
- Ugly cups to measure sealant with. I don’t really measure how much I put in, I just kind of eyeball it, but if I am swapping tires and the sealant is fresh in there, I do not want to throw it out, so I keep two of these small cups and I can scoop out the tire and use the sealant later.
- Part of the Orange Seal line of stuff is this smaller Squeeze bottle with a length of plastic hose on it. I can pull a valve core out, slip the tube over the presta stem, and squeeze some sealant in there without removing the tire.
- This little plastic dipstick also comes from Orange Seal and it is used to check for sealant in the tire without removing the whole thing: Pull the core, put the valve at bottom dead center, then stick the dipstick in and see if it’s still wet in there. Honestly a zip tie is just as good.
- An old spoke to stick into a clogged valve. Sometimes the valve can be clogged from dried latex, often the removable core is the issue and can be replaced or cleaned, but sometimes there is a big, snotty, clog inside the valve in the rim cavity. An old spoke is nice for poking some holes in this blockage and is not sharp enough to hurt a tire casing.
- A presta valve core tool. I have a blue one from Park (shown here), a red one from somewhere (can’’t find that thing), and one from Topeak that works for both types of valve (presta and schrader) as well as acting as a little wrench for valve extenders. It even comes with a little ‘case’ that attaches to a floor pump hose so it is always handy. Cool. https://www.topeak.com/us/en/
products/upgrade-kits/942- valve-tool - Milkit bottle. I have kept this in the bucket for tires that need a rapid ‘bump’ of air to get the tire to set. It works pretty well, especially for smaller tires. It is a bit volume challenged, so it might run out of breath for a larger gravel tire, but it’s handy enough to have regardless.
What is NOT in the bucket? Well. a few things. I keep some rolls of rim tape about so I can re-tape if needs be. Some is Stan’s Tape, some is some blue tape that I think was a Specialized thing, and I even have used Gorilla tape if the tire fit is loose.
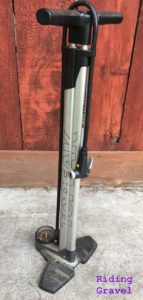
As well, I have one floor pump that has been a real soldier. This Topeak Joe Blow Ace is as old as the tire levers and has been one of the best pumps I have owned. It actually is a three stage pump in that you can adjust how much air is pushed out per stroke. There are three settings…60, 120, and 200. 60 gets you a lot of air per stroke and once you get close to 60psi, you are really working hard to keep going. Of course 120 is the next level and allows for a higher pressure tire, like a road bike, with little effort. I seldom use the 200 setting, but if that valve is clogged a bit, that type of pressure can overcome about anything. 60 is good for setting tubeless tires and full on use for gravel and MTB and the 120 is good, as I said, for road. It’s very ‘metallic’, in that there is little plastic-ness going on and it weighs a good bit. It;s just been a warrior in the garage battle. The gauge is smallish, and since it needs to cover 30-200 psi, the numbers are not very well spaced. My only complaint.
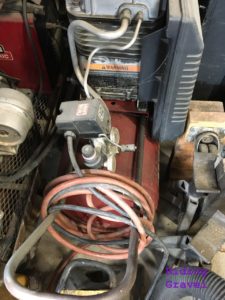
And if all this fails there is this: An old Craftsman air compressor. It clanks and wheezes a bit, but that big tank charged to 80psi will either set a tire in rapid order or let you know it’s hopeless and you should move on. I use this less and less these days, but it’s there just in case.
Now then, as good as my old Topeak three stage pump is, I was curious how a newer soldier might work for my main garage duties. And I was also curious about a bigger capacity inflation bottle that could store and push more air into a larger volume tire. Topeak sent out two pumps and a very nice inflation bottle and we will be looking at those next time after I use them a bit more.
Hint. After having digital, it’s hard to go back.
Meanwhile I have to ask…what is in your bucket?
Next: Guitar Ted will share his tools used for his tubeless work. Hint: They are quite different than Grannygear’s and not in one bucket! Stay tuned…


Grannygear – has the gorilla tape ever given you any trouble? I’m thinking of doing that with a problem tire/rim combo and didn’t know if there are any downsides.
Thanks
Mark
@Mark…I have not used it lately, but it works very well. It is thicker though and I have had combos of tore.rim that did not want to pop over the bead seat. It also, like many tapes, is not stiff enough to prevent dimpling at the spoke holes under pressure. That can make remounting a tire and getting it to ‘take’ a bit more difficult.
I really like the way Trek has those rim strips…or even better yet, sealed rim beds, but then the spoke replacement on that set-up can be tricky.
gg
Awesome. Thanks for the info!