

A Spectrum Of Lights: Cutoff Beam Lights From Bontrager & Outbound Lighting – by Grannygear
Testing a nicer, kinder type of bike light: Cutoff Beams – A better light for bike commuters or is it more than that?
I do not commute by bike. But I do spend a fair amount of time on dark roads, a light showing me the way as I complete my various gravel bike loops. And being on paved roads often means facing oncoming vehicle traffic. And if I were on a bike path I would expect oncoming bike traffic and runners, walkers, etc.
So here I am with my very bright LED bike light strapped to the handlebars, enjoying a well lit path of light. It’s all fine and dandy, but maybe not for anyone at whom I am pointing that light. In fact, it’s likely they are annoyed and maybe even so blinded by the light that they would be struggling to see where they are going. That could be bad. When I am approaching other riders in the dark, I often reach down and shield my headlight for the time I am close in passing. That is fine if it is safe and prudent to ride with one hand and cover your light. On the road and in traffic, or even on a busy bike path, this action would be unwise and possibly quite stupid.
You see, the typical bike headlight puts out what could be described as a ‘cone’ of light, just like a simple flashlight. The beam pattern might be wider or more narrow (flood or spot) but the light beam that is shining down and sideways and forward is also shining up into space. You can see this when you ride under overhanging trees or see the light hitting road signs along the way.
Cars know better
Car headlights are not like this. They are designed to light up the road, but they have what is called a ‘cutoff beam’, meaning they do not put out light above a designed-in, horizontal line, at least on Low beam. You can see this when you have your car facing a wall and turn on the headlights. They are not made with a simple lens (or optic) like most bike lights are, often just picked out of a catalog of optics designed for industrial LED use, but instead they have a quite complicated reflector system or some other engineering black magic to accomplish that shaped cutoff beam.
So what if we built a bike light to have a cut off beam? Well, it has already been done, and in Germany it is required to be so. It is a part of what is known as the StVZO, meaning Straßenverkehrs-Zulassungs-Ordnung, which is German for…well I really have no idea what that actually says, but it relates to a lighting standard for anything used on the road, including bikes. Or at least, that is my understanding of it. It requires that the Low beam be a cutoff beam that meets that standard, but does allow for a High beam that breaks that standard and runs over the cutoff.
Wouldn’t that be a very smart light to use on a bike? It would bring none of, or at least, less of the issues with regard to offending other persons at night, and it would provide a nice, clean, light pattern that would show you all you need to see. Well maybe so, maybe not. In fact, the “all you need to see” part is a very definite maybe, trending to no, not-at-all, depending on how you are using the light. Let’s look at a couple of samples of this kind of light and see what I found after using them for gravel bike rides. If you want to read that part first, then skip down to the “Elephant In The Road” section.
I will lay out some of the details of each light I have as a quick review, then, based on my experiences with these two lights, I will discuss where I feel this type of light works well and where it falls very short. Because I think that matters more than anything for a potential buyer.
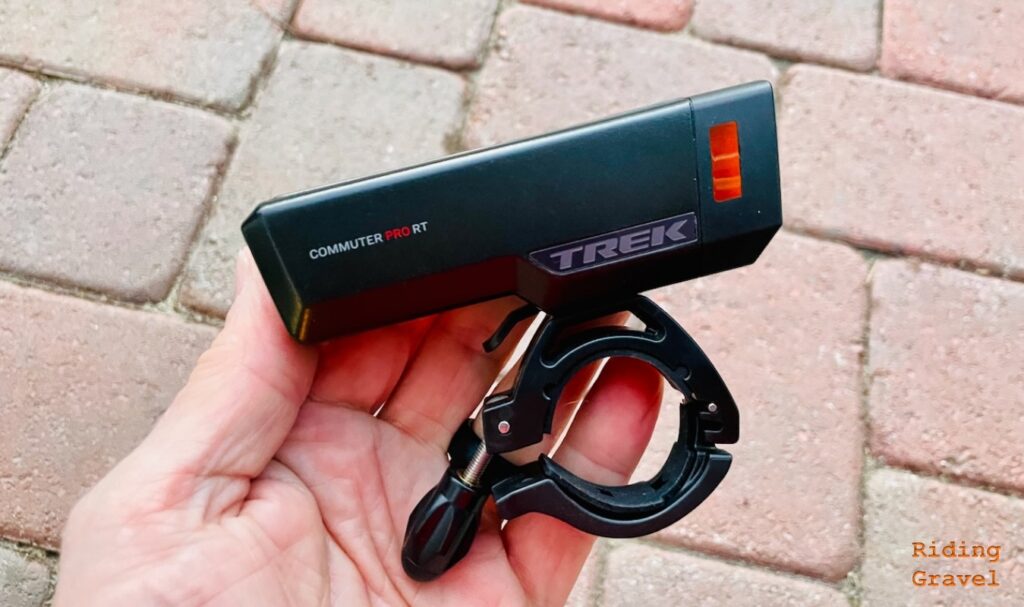
Bontrager Commuter Pro RT Front Bike Light. (webpage link) $159.99
When Trek jumps into a segment of things, it does it in a big way. They are committed to getting lights onto bikes, especially for visibility on daytime rides. When I grab a light for a ride, it is very likely going to be a Bontrager light that I grab. Especially when I want a simple, effective light for road or gravel bike rides. The Ion Elite R is a very good little light, for example, and I use the Ion 200 Front and rear light set of blinkies on every ride that exposes me to any traffic at all.
But now they have introduced two lights with a cutoff beam to it. And I have been running the high end model through some paces to see what it is about and if it’s something I would find useful for my needs.
From the Trek website:
A do-it-all front light that’s powerful enough for off-road riding. Kindbeam keeps more light on the trail ahead of you while avoiding oncoming rider’s eyes, for a bright light that won’t blind other trail users. A visible fuel gauge, wireless connection to tail light, and Charge-back that works as a battery bank for charging gadgets, round out an industry-leading set of features and make this our best front light option.
- Commuter Kindbeam keeps light on the ground ahead of you and out of oncoming riders’ eyes
- 1000 Lumen high beam setting lights up full path or trail, ideal for use as MTB light
- Wirelessly pair with Flare RT for single-button power-up on both front and rear light
- Dual fuel gauge clearly shows available battery life and battery life of paired light
- USB-C charging port supports chargeback for recharging phone or cycling computer on-the-go
- DRL-specific focus, flash, and range flash patterns offer ultimate daytime visibility
- Runtimes: high 1000LM — 1.5hrs, low 500LM — 3hrs, day flash 300 LM — 12hrs
- Includes Commuter Pro RT light, Adjustable hard mount, and USB-C charging cable
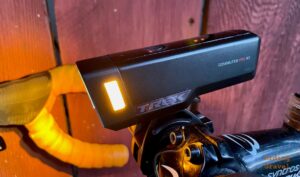
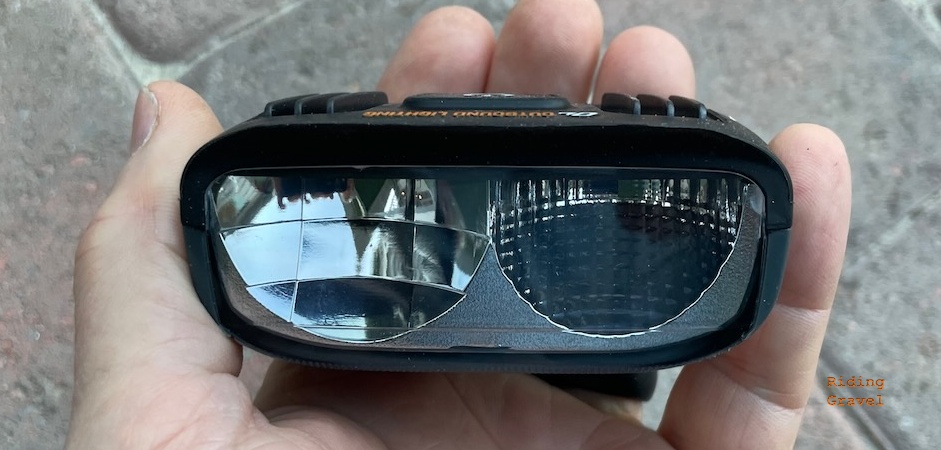
It’s a nicely built light with a sturdy clamp/mount and a rather different looking ‘face’. The reflector is quite unique looking, but is designed to allow for that shaped beam of light. There is a power/mode switch button on top that is illuminated and a set of LEDs on the top that give battery status. There are only three modes: Low High and Flash. When the light is in High mode, the Mode button glows blue like a car’s High beam indicator light. Clever.
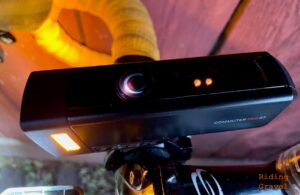
There are Bluetooth features that I did not use and may not ever use, but really my intent was to evaluate the light beam and how versatile it is or is not. And so I charged it up and shot some images of the light’s pattern in my back yard before I set out.
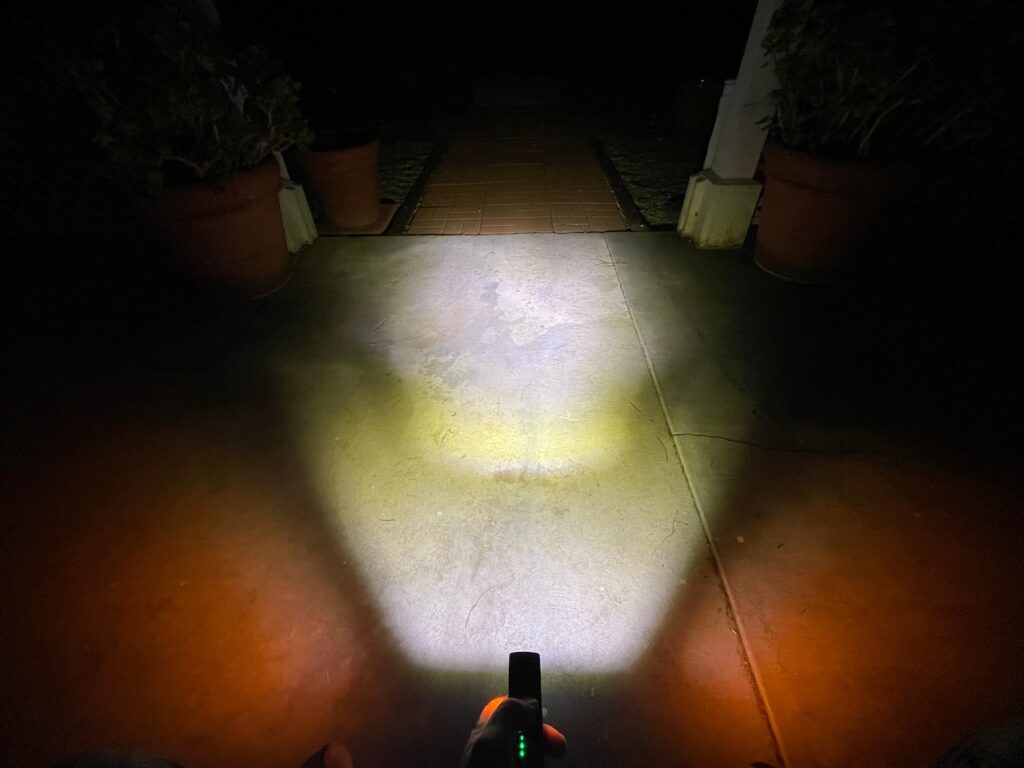
The beam pattern is a rather dramatic shape with very focused areas of light and large areas where there is no light. There also is quite a color shift as seen in the pics, although the camera is making it more severe than it really is to the naked eye. Low beam has a very dramatic cut off as to be expected, but when on High beam it tends to ‘bloom out’ a bit and fill in the more dark areas.
I took it on a loop that was an hour long mix of two lane road with lots of cars and a great deal of ambient light, a winding country road with no street lights at all, and a dark, dirt road section that, while not highly technical, was rough enough to give me a chance to get into High beam.
I ran it on Low beam for most of the way, getting into High beam for perhaps 30% of the ride. I used one ‘bars’ worth of battery power.
The Good:
- The Low beam setting (500L per Bontrager) is adequate for street riding and lower speed bike path riding, even dirt road cruising. The light is a bit center focused, so the hot spot is pretty good.
- The cutoff beam in Low mode is very obvious.
- High beam fills in enough to make darker sections of road and trail more welcoming.
- Three light settings are enough for the intended use in my opinion. For commuting and rides like this loop, Low and High are enough.The button action is easy enough to cycle past Flash without a great deal of effort and bother. More on Flashy mode later.
The Less Than Good:
- High beam is not much of an improvement over Low. In fact I had to stop and swap between the settings in a dark area to really know I was in High beam (other than the Mode button light being blue). It does not extend reach that much, but it does fill in the darker areas from Low beam. It also lights up the trees above you, but not by a great deal.
- I don’t think I would want to push this light very far into higher speeds. High beam does not provide very much throw and that cutoff beam presents issues that I will get to after I sum up my findings of both lights.
- That Mode button is easy to see, but not that easy to use in a tactile sense, especially with long fingered gloves on.
- That darn flashy mode requires me to rotate through it to get from High to Low and back to High. I hate that. It is two more button pushes while I am riding with one hand off the bars and one to two more seconds of light I do not have.
- The aberrations in the beam are pretty severe, enough so that using it in the true dark and in the dirt was somewhat annoying. That was due to decent sized areas that had little light focused on them. On the road and in areas with lots of ambient and changing light, it was much less of an issue.
Let’s sum up how the ride was as a whole with the Bontrager Trek Commuter Pro RT Front Bike Light. When I was in the trafficked area of the city section, it was quite good to ride with and I did not get the feeling I was annoying any cars. I was thinking this would be a very good light for riding home through the city and multi use paths. On the more rural country road it was also ok, but my speed was below 20mph, more like 10-15mph. Into the dirt it was less adequate and I used High beam a lot just to get a feeling that I could see what was coming up and to be riding less in a narrow ‘tunnel of light’. When it got to be a bit more than a flat, dirt road, such as a sharp dip or a sharp turn, the cutoff beam was a bust. Again more on that later.
Now dirt road riding might be taking the light out of its core usage, that being commuting. However Bontrager makes a claim in their ad copy about using it for MTB riding. Ah, no. Not for me thanks. And that feeling is shared with the second light I will be looking at, although it is slightly better in that regard. The Bonty light’s pattern is way too narrow and broken up to use for MTB riding where you need a wide and smooth beam of light to not have things sneak up on you. Plus I could outrun this light pretty quickly, not due to the brightness of the light, but due to the beam pattern. In that way it is hardly “ideal” for MTB rides.
Now as a city type light, yes that cutoff beam has to be a good thing. I was getting enough light on the ground to ride confidently at typical cruising speeds and in the traffic areas I never worried about flashing someone with the light. I never used High beam there. Did not need to.
Outbound Lighting Detour (webpage link) $179.00
Outbound has some of the more unique approaches and tech built into the lights they sell. The two main characters running the place bring a mix of LED tech and automobile lighting engineering to the bike lighting world. Their Trail Evo bar light is the best MTB light I have ever used. And now they have the new Detour, advertised as a Road/Gravel light.
And yes, it has a cutoff beam.
Some of the high points of the Detour. Note: Many features are shared with their other lights:
- A bar mount that is solid and adjustable. Tech taken from the camera industry. It is a step above most other light mounts.
- A USB C charging port with Pass-Through charging so you can plug in a separate power bank and extend run times.
- A clean and self contained design, in this case, the ‘case’ is made from an engineered resin that conducts heat and is light and tough.
- Simple mode selection. You do not have to roll through any flashy modes to get around the horn from Low to High. Flashy modes (two of them) are accessed with a long press of the mode/power button upon turn-on.
- There are 4 light levels: Adaptive, High, Medium, and Low. Adaptive is another unique feature of Outbound, allowing for longer run times at higher levels by auto dimming the light output over time. I covered this in more detail when I featured their lights in this post. I found Medium to be a light level I used a lot and that is claimed to give you a 4+ hour run time.
- They rate the light in that 1100/1200L range (High mode, I assume)
So this light purports to be a dedicated road/gravel light with commuting chops too. The beam, as I said, is cutoff, and the pattern is called out as wide and bright.
So let’s see if it seems to be all that and a bag of chips. Is it the complete light I am looking for?
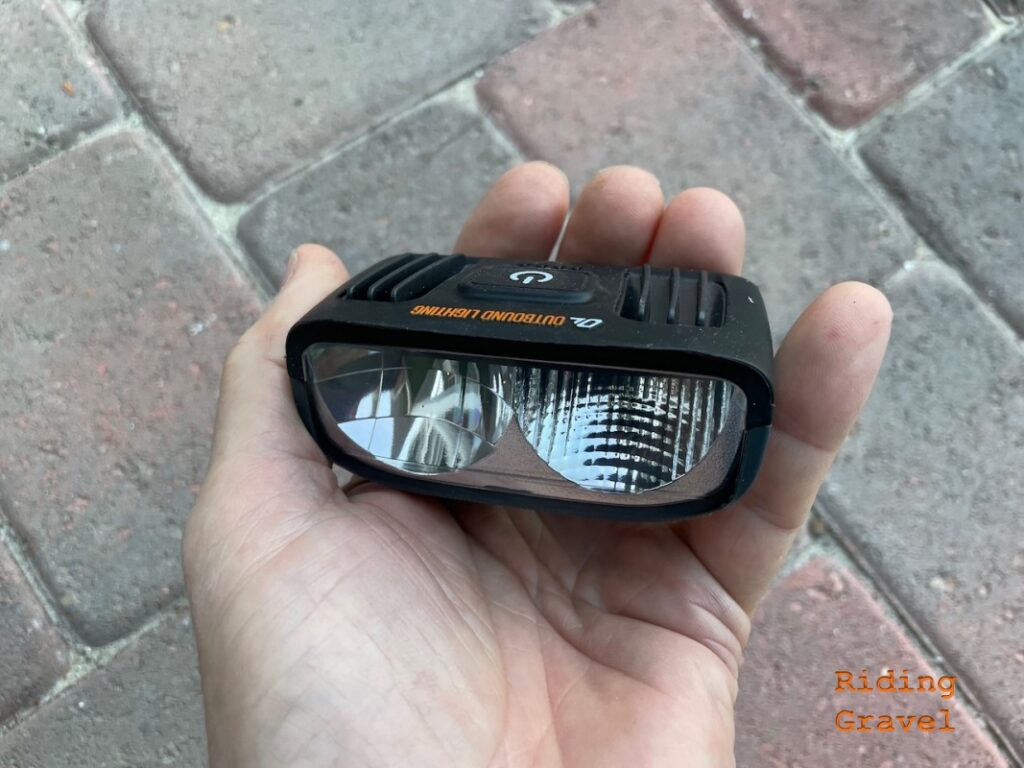
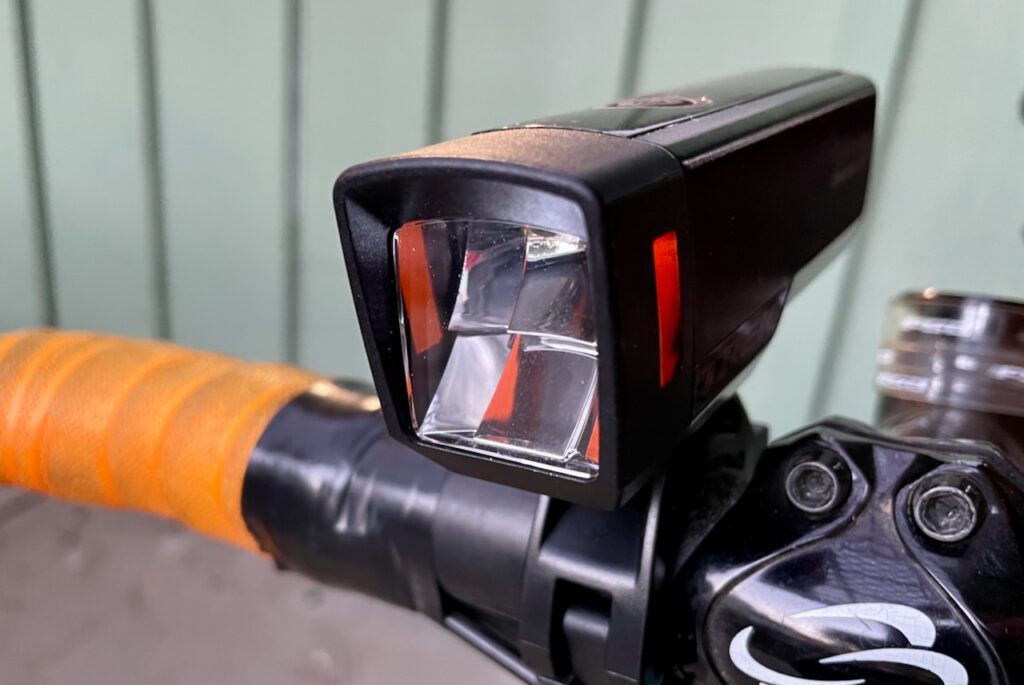
First off, it is like every light I have seen from them. It seems well made and looks really cool, having a shape that is not the typical square flashlight looking form. It weighs less than it looks like it would too, actually feeling lighter in the hand then the Bontrager light. I was familiar with the light mount so I put it onto the Lynskey and charged the light, looking forward to putting it on the road that night.
The first ride was a 2 hour loop with a mix of two lane main road, old and forgotten badly paved road, and then some dirt road riding that is very typical of a So Cal gravel bike experience…steepish climbs with ruts and techy-ish descents with more ruts and loose rocks and sand (I also took it on the same 1 hour loop that I did with the Bontrager light).
What I got was not what I expected and was my first introduction to this cutoff beam deal ( I actually got the Detour before the Commuter Pro RT). And while I was pretty disappointed in some ways with the Detour, it was not so much because of the light’s failings. Rather it was a major issue that is shared with the Bonty light as well and seems to be just the way it is with the cutoff beam approach to things.
The Good:
- The beam pattern is wide and bright and easy to ride with. There is light from the front wheel, out to each side, and forward a pretty good ways. It feels welcoming and did not feel too claustrophobic like the Bonty light did in really dark places.
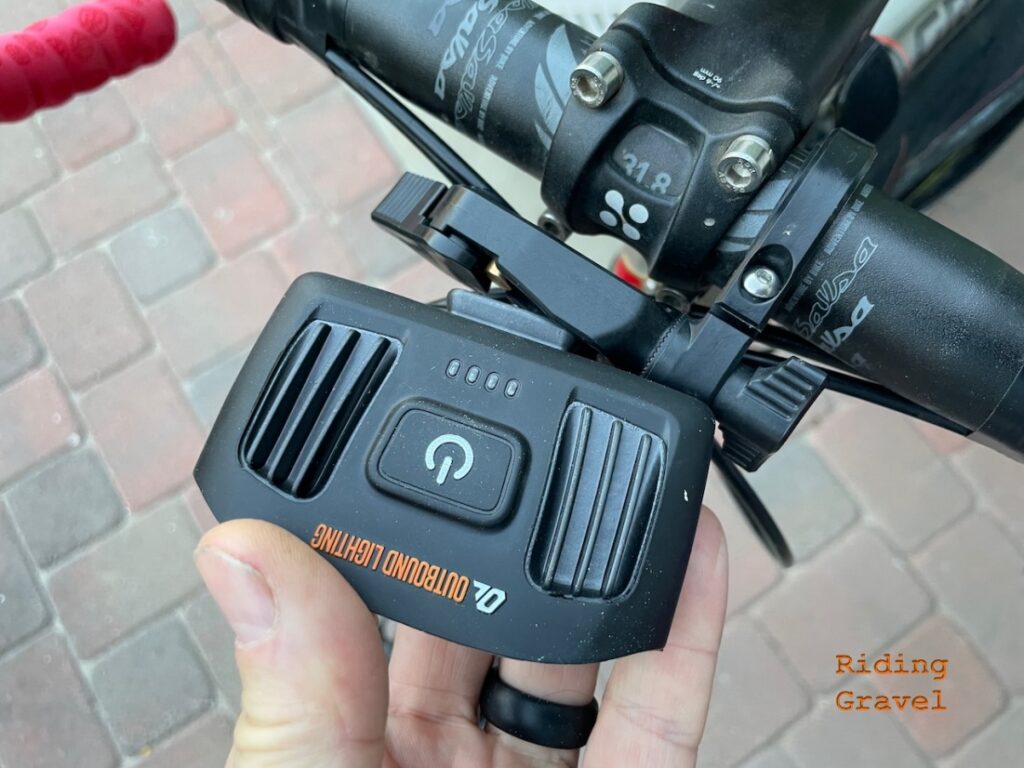
- The mode button is not illuminated but is big and easy to find and use in the dark. When you press it, the LEDs that show battery status change to show the light mode level, so if you are on Adaptive, 4 LEDs will be lit for a few seconds. If you are on Low beam, then one LED will light for a few seconds. Then the LED array shifts back to battery status.
- The mount is easy to adjust with a serrated clamp that allows for pretty minute vertical adjustments. As well, you can move the entire clamp section on the bars if you leave it loose enough. Then, once you find that right setting, you can snug the bar clamp and never have to adjust it again as removing the light does not disturb the clamp.
- Four light levels ought to be enough for everyone and the two flashy modes are accessed with a long press upon power up. Excellent.
- The cutoff beam is sharp and defined and remains so even in the higher light output levels.
- I found that Medium was good for most of the time with the Detour unless I was moving pretty fast or really needing to clarify things. On the same one hour ride that I took the Bonty light on, I was able to stay in Medium for most of the ride and only went to Adaptive (High, sort of) for less than 10% of the ride. At the end of that ride I was still seeing 4 bars of battery life.
- The look of the front face of the Detour makes me think of WALL-E and that makes me smile.
The Less Than Good:
- I was able to outrun the light beam when speeds came up. You know how the old Maglights allowed you to turn the light bezel and focus the beam? I wished I could have done that juuust a bit on the Detour. The light spread is wide enough to survive a bit of narrowing and still be just fine.
- I did notice some dark spots in the beam pattern when in Low beam and moving slow, like climbing in the lower gears.
That Elephant In The Road: That darn cutoff beam.
So here I am with the Detour, doing that initial two hour loop. The road up to this point was very open while the sun dipped over the horizon. Now the sun had set and I had turned onto a 1.5 car-wide, poorly paved road with very sharp corners and fast, steep dips and climbs.
I switched on the Detour.
I was met with a very wide swath of light that was all I needed for the moment, and that cutoff beam was pretty striking to see. Then I made a sharp turn at speed into a corner and I felt that the light level was now less than I needed. How odd!
Then I rolled past the corner and the light seemed OK again. My brain had stopped sending out caution messages. Huh! Back to normal riding.
I spent some time in the more remote sections of the next piece of the route, an abandoned road area, getting the vertical adjustment (tilt) of the light correct. It is odd to be riding under tree cover and not really see it be lit up. I also started to feel like I wanted a more ‘pointy ended stick’ with the Detour’s light beam. I would have liked a bit more of a center focused spot so I could see what was coming up from a greater distance.
Then I hit the dirt. Like the Bonty, where Low beam was fine for lower speeds and slow climbs, I was very happy with either Low or Medium with the Detour. So far I was not elated overall, but it was working well. Then I hit the top of the ridge and began a few miles of twisty dirt fireroad that had a few off-the-back-of-the-saddle descents across multiple ruts all sprinkled with loose rock and sand. On an MTB, it is just sort of concerning. On a gravel bike you really need to pay attention here. And by now it is fully dark.
That is when things got terrifying.
I felt like I could not see anything, but that feeling was very off and on. It was not like riding with a light that is way too dim. No, it was different.
And I realized why. That cutoff beam pattern that both lights have is not a plus for you when your light is not level with the horizon or if your bars are pointed down, like when you are dropping into a deep enough dip or even a sharp corner. You see, in these situations when you are riding with a headlight that provides a more normal ‘cone’ of light…a cone that would likely be shining off into space most of time…that cone shaped beam would now be scattering light right where your front wheel will be in a few seconds from now. Well that cutoff beam does not have the top half of its pattern to work magic for you. No cone.
So you get this bright, horizontal line of light that shows pretty much nothing but complete blackness above it, especially so when it is truly dark out there. Your eyes adjust to the light and the dark beyond gets even darker. And when that cutoff beam is tilted to one side, like when you are leaning the bike over or even turning the handlebars sharply, such as turning into that steep descent across those ruts, the light is just not there.
Now the Bonty light, when in High beam, does improve on this somewhat as the light overruns the cutoff. But it’s not great. Not at all.
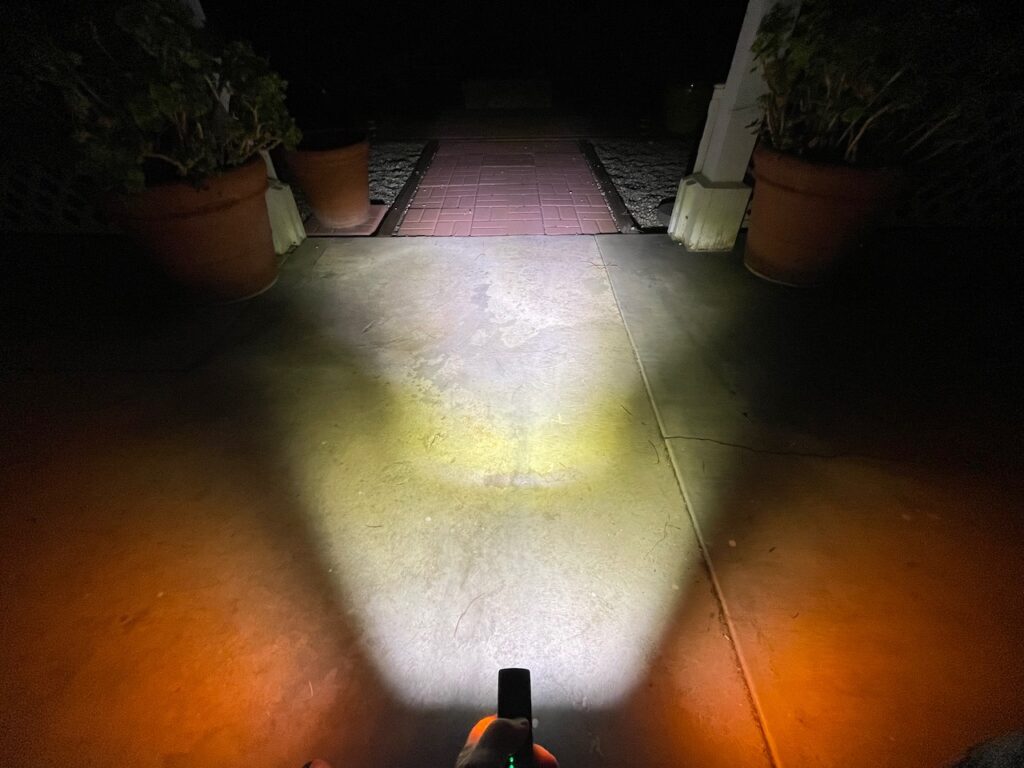
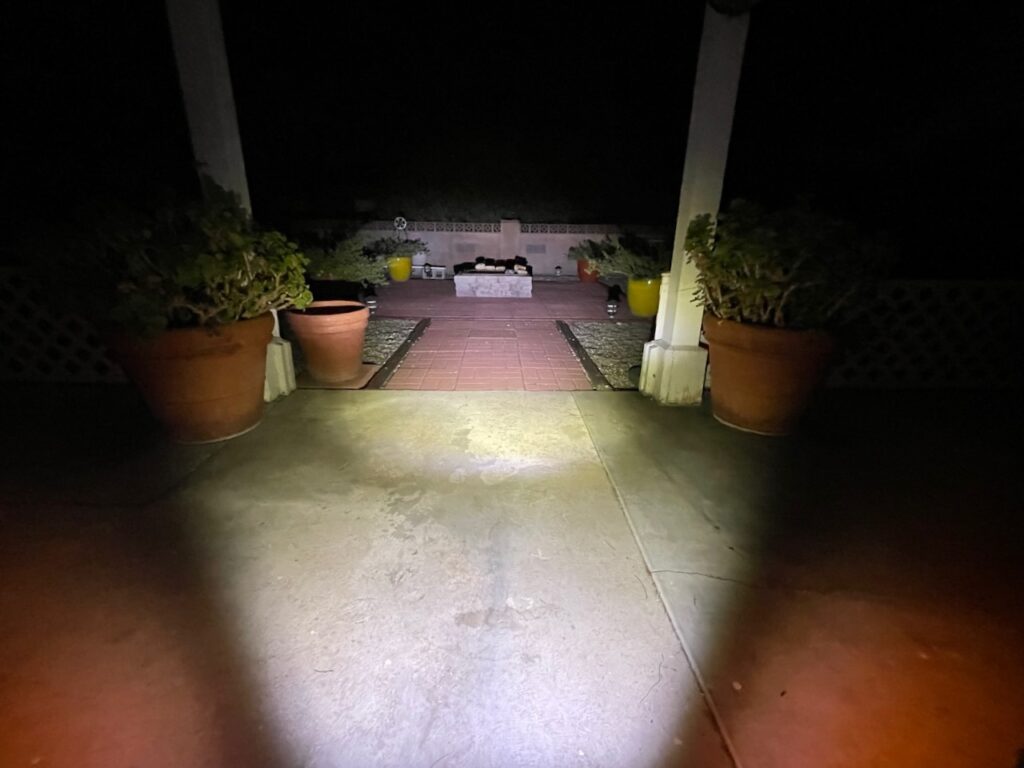
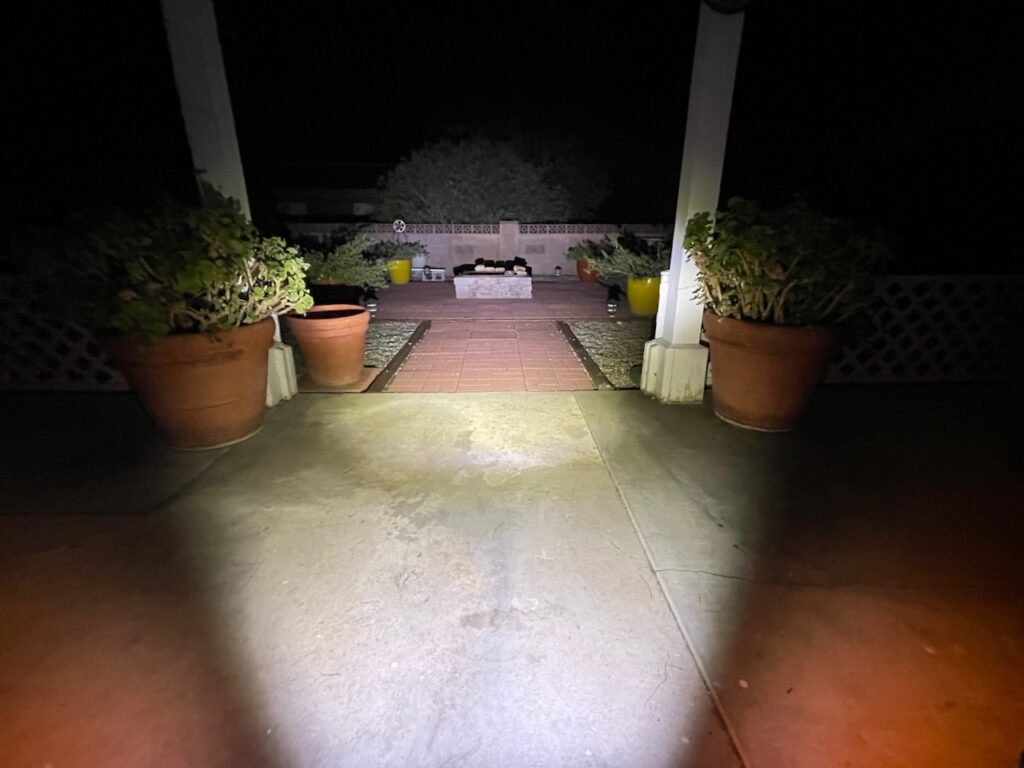
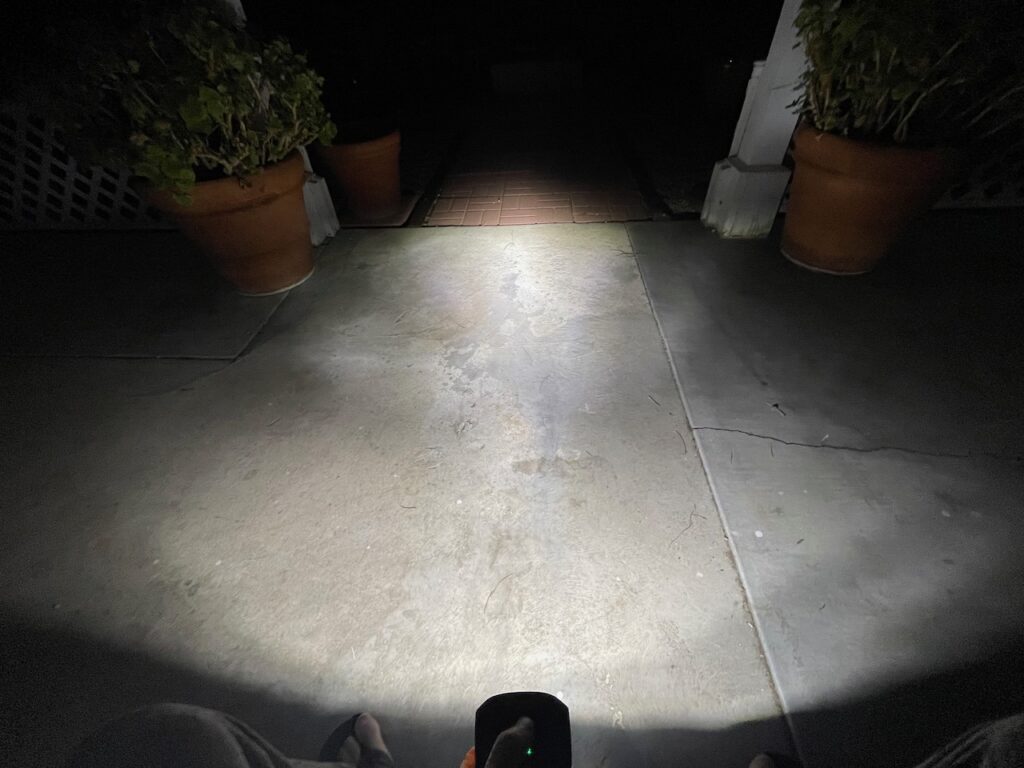
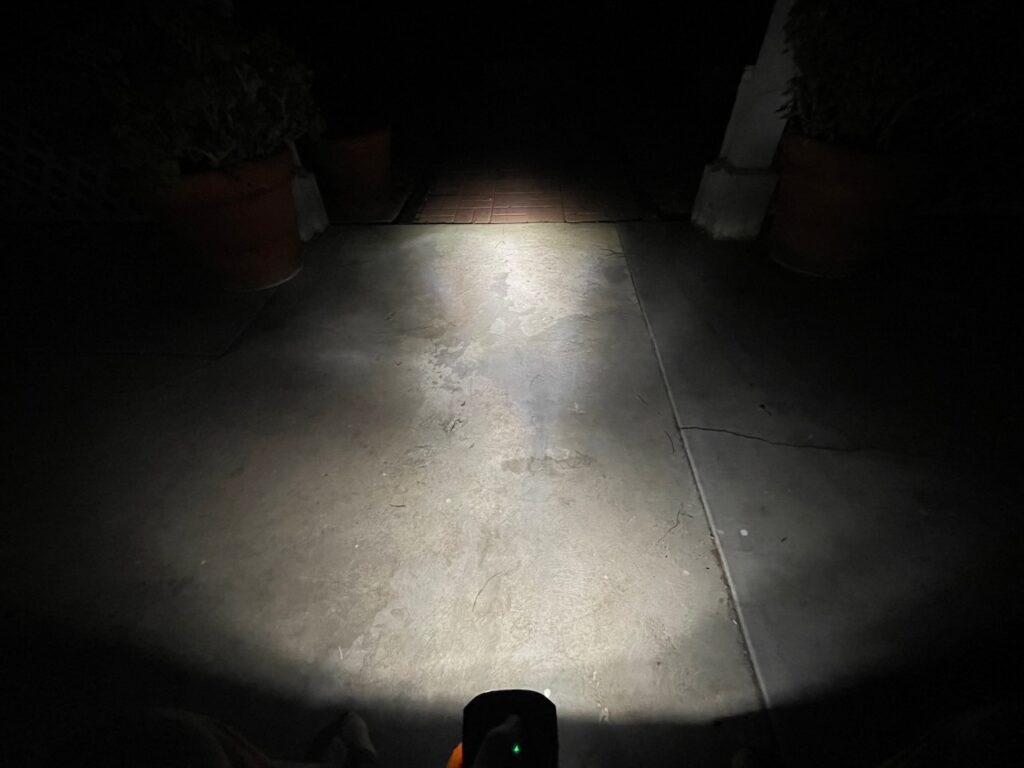
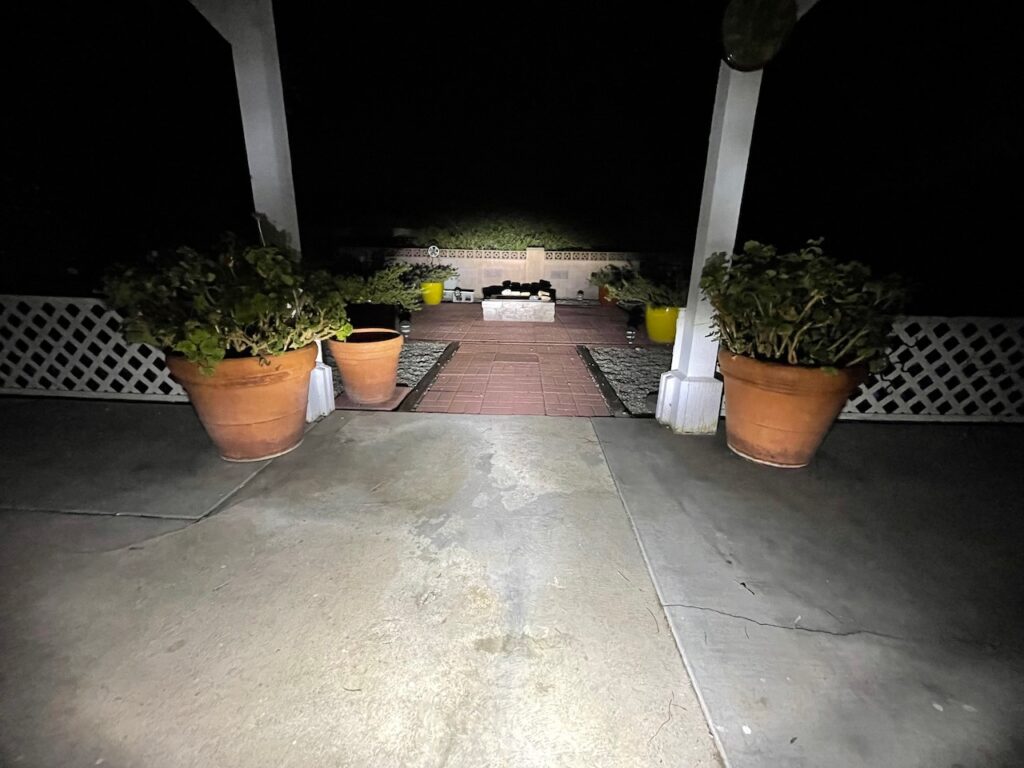
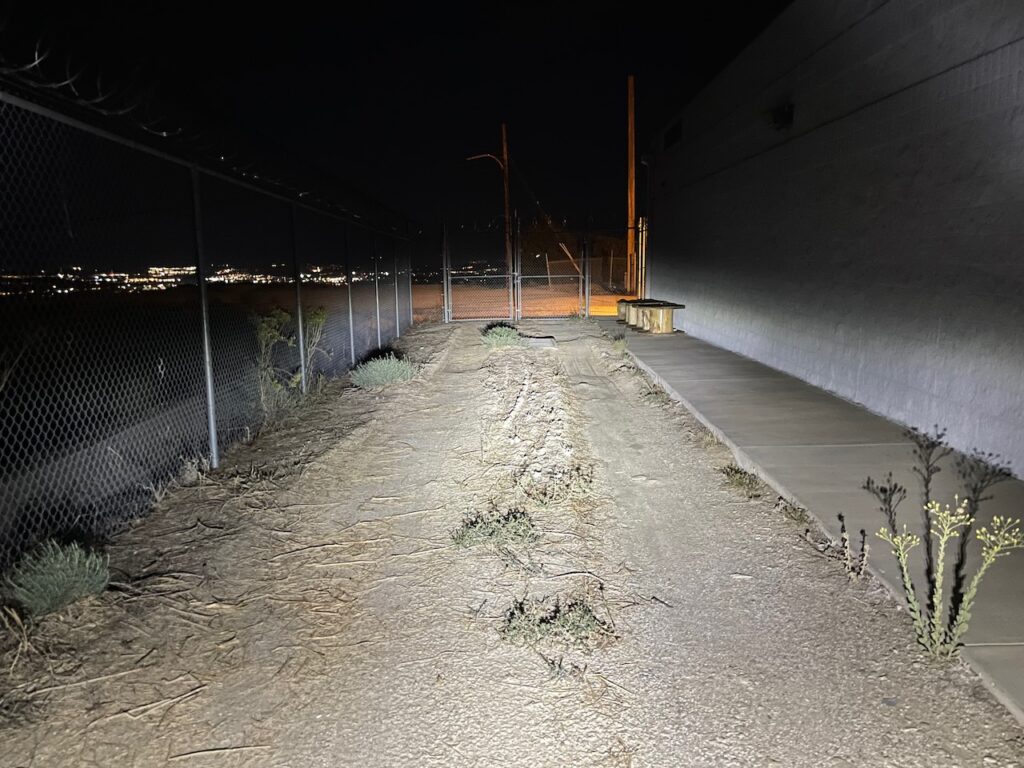
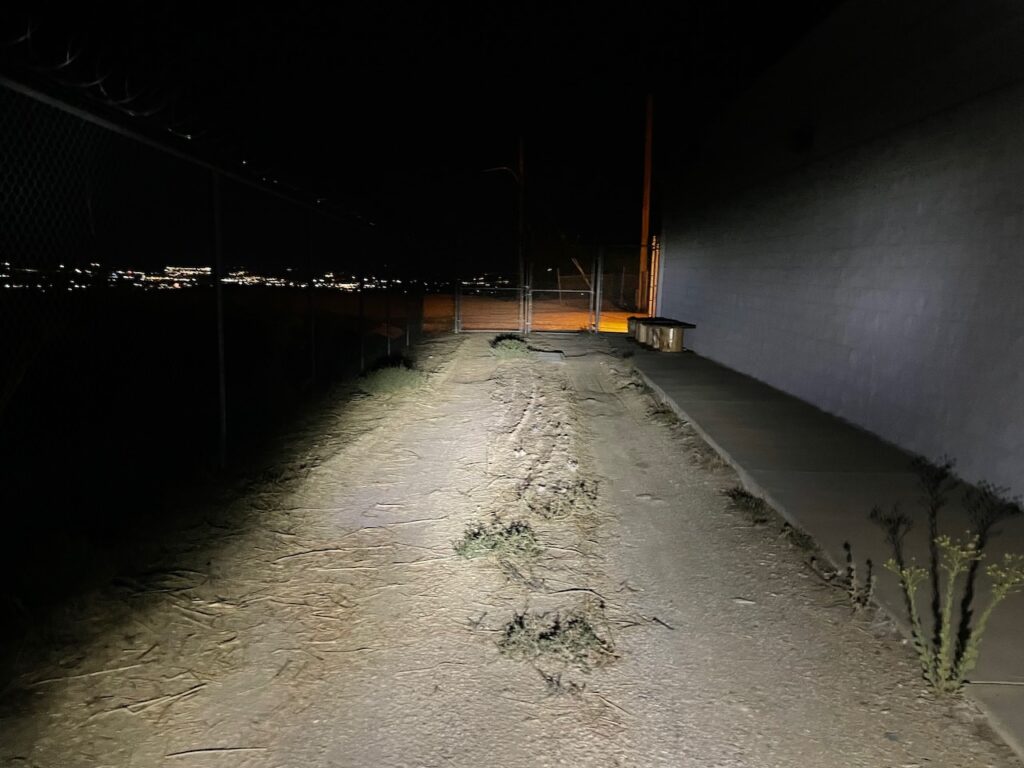
I took some pics to show what I mean. You can see what each light does when level, lighting up both the fence and the building, and you can see the cutoff beam working. But when I rotated the light a few degrees, you can see how that ‘flattish’ light beam tilts like an airplane wing and leaves you with some pretty dark spaces. And those dark spaces are right where my eyes are looking because that is where I will be riding in a few seconds.
Does This Characteristic Matter For Gravel Use?
Is the cutoff beam a bust for anyone other than a city dweller?
Well that depends. If your riding is mostly on level to rolling ground then I don’t think it’s a big deal. However neither light threw far enough for higher speeds in my opinion, like over 25mph, even while riding on the pavement.
And if you spend a lot of time riding where oncoming traffic, either vehicle, or bike, or people, is typical, then that would be a vote in favor of this type of light. You might be willing to accept the compromise it brings. But I cannot see this cutoff beam, assuming these lights are a good example of the genre, being good for anything that is technical or steep. At least this boy will not be using one.
Of the two I sampled, which light do I prefer? I have to tip toward the Detour. For me, it is a better off-road light. Well, it actually is a better light anywhere that it is very dark. I preferred the more even and broader light pattern. The ability to use Medium mode and still have enough light leading to longer run times was attractive. Add in the potential to extend run times with an accessory power pack…nice.
The down sides of a beam that could be a bit more center focused are being addressed by Outland and they will be making running changes to see if they can tighten up the beam a bit. That said, I bet the typical commuter would not care too much about this. And maybe not a gravel rider where speeds are more moderate. But as a road light? Not enough reach as it sits.
Back to the Bonty light. As a pure city light or commuter light where the terrain is not too technical, the Bontrager light is fine. And you have the advantage of the huge Trek network of dealers and such to support your purchase. And it is cheaper. I would use this around town or on our local bike paths. It’s mostly when I hit the dirt that it fell short for me.
N+1 light solution?
Now here is a thought. Let’s say you have a real need or desire for either one of these lights. But the shortcomings are an issue. How about pairing them with a spot beam helmet light? That way you can be kind to other road users using the main light only, and when you need to see around corners or down the road more, you can light the torch on your helmet and see where you are looking. As I said, it’s a thought.
Now I am sending the Bontrager light to Guitar Ted because he actually commutes and does more in-town riding then I do. So I am curious to see what his take on this is. Maybe I am way off base on my findings. We shall see.
I’m going to keep the Detour light to compare it to any future versions that come along.
But unless something changes my mind about these cutoff beam lights, I will be embracing the more normal ‘cone’ of light for my night rides.
NOTE: Bontrager and Outbound Lights sent their products featured in this post to Riding Gravel at no charge for test and review. We are not being paid, nor bribed, for this review and we always strive to give our honest thoughts and views throughout.


Interesting read. I have looked at both these in the past but dismissed them for both ultimate light output (too low) and the compromised beam pattern (for the purposes I was planning to use them). I ride in the UK on relatively busy roads, non technical off-road which we can choose to call ‘gravel’ and MTB on steep technical trails that are like a greased pig at this time of year.
First, it is very much a case of two lights are better than one. I always use a helmet spot of about 1800 max lumens (Exposure Diablo), but most of the time that is throttled to the low setting. On the handlebars I have a Ravemen PR2400 with a max of 2400 lumens and a long burn time. It also has a cut off beam which works very well with oncoming traffic; usually I have it at about the low setting again which is about 500 lumens and 11 hours of burn.
As soon as things speed up or get technical I have a one button press to flip into full high beam. That really is plenty for me with one caveat – if you ride in company and they have higher powered lights you will still get a bit of ‘riding in your own shadow’ effect when being followed. It happens.
The helmet light is also switched to high output for anything technical. The benefit being it is always pointing where I am looking which is the critical factor. With that approach you can get away with the handlebar lights acting as a fill while the helmet light covers the detail. For that reason I would personally not ride without a helmet light for anything outside a commute.
I have written a review of the Ravemen PR2400 which I hope you don’t mind me linking to (happy for you to remove the link if it is). I can’t fault it beyond it being a little weighty but think that’s a fair compromise for something that retails relatively low and goes on the handlebars.
Thanks, Matt
Yes, the Ravemen PR2400 is the ultimate bicycle front light. A little costly at $155, but they really thought out the design in terms of beam shape and lumen settings. USB-C, yay! Wish that the DRL was “breathe mode” instead of a strobe.
The other front light I like is the Gaciron V9PD 1800.
For a rear light, the Cygolite Hotshot 350 is the best I’ve found, though I wish it were USB-C.
Wish that bicycle shops would carry the good lights instead of being tied to the brands owned by the bicycle manufacturers.
I think that Ravemen is not well known in the U.S. because the margins are not high enough for bicycle shops to carry them (bicycle shops want “Keystone” margins which is 100% over wholesale cost).
Bicycle shops that carry only Trek bicycles also have to carry only Trek’s brands of accessories unless it’s a category that Trek doesn’t have products for. Too bad because cyclists that don’t do research often end up with inferior accessories.
One possible shortcoming of a cutoff beam – you can’t mount it upside down, under the bars, as I usually do. This protects the light somewhat, in the event the bike tips over -with you on it or not – keeps the light from snagging on things and makes more room for other bar-mounted accessories.
I have the Outbound and they do make a Garmin mount that allows underneath mounting without flipping the light over. That’s what I do since I have a Garmin Edge 1030 plus up top.
Why would you review commuter lights for off-road use ?. Both Bontrager and Outbound make off-road lights for gravel and mountan use ? And all of outbounds lights have cut offs. Wierd choice of review . Outbound hangover would be a cheaper and more effective choice 🤔.
@Kanan – Why review cut-off beam lights? While there is little traffic in rural areas, that is not to say that there is none at all. Also, many people start rides in urban/city/town areas and ride out to the country and return again. On roads. That have car traffic.
Make sense?
@Kanan. As well, Outbound lists this as a Road/Gravel light on their website. And Trek says theirs is good for MTB use. Soooo.
I have the full set of Outbound lights for MTB riding and they are not a cut off beam. They are a ‘shaped’ beam in that the light pattern is not a simple cone of light. But I doubt they would pass the mustard for the German standard. If they did, then there would have been no need for the Detour.
Great article.
I have an older Axiom Lazer 600 headlight and love it. I love the fact that I can carry a backup battery in my jersey pocket. Not many headlights allow interchangeable batteries.
I guess where I live my roads at dark enough at night that that little light is more than enough light for me. I mostly run it on medium and the only time that I run at full brightness is only on the fastest of sections of road.
I have been looking for a replacement headlight for sometime now and a few things I am looking for is a means to add battery capacity or recharge on the fly and a more friendly headlight for fellow road users.
I usually only tighten clamp on my headlight so that I can still rotate the headlight up or down so I am not blinding oncoming cars. So seeing and hearing that more headlights are going to cutoff style beams make me happy.
I have seen the Raveman headlights for a while now but when I read about the Outbound Detour and see that they make a mount that allows me to have it below my Garmin using a gopro mount I am kinda of sold on it.
It ticks off all the boxes that I was looking in a replacement headlight.
Cutoff beam, check.
Can add a external battery to extend run time, check.
Can be mounted below my garmin using a gopro style mount, check.
If there was one thing that I would/could hope for would be another step in brightness, so make 4 steps in brightness in steed of only 3.
I’m not sure of the point of this comparison and resultant article, other than an opportunity to get a couple night rides with some fun new light options.
First, if we’re talking about gravel, why do we need cutoff at all? The whole point of gravel is to get away from other users, so who cares if our lights have cutoff?
Second, you admit you’re not a commuter — the use for which both of these lights are intended.
Finally, the biggest concern you voice (type?) is the lights’ inability to show what is coming when the handlebars are at an off-angle. I have to agree with your readers who use a helmet-mounted light. I have never found a way to illuminate what is coming up around the corner without a helmet light, as the bar-mounted light points where the stem points and that is often not where I’ll be headed in a few seconds (as you have learned).
@Jon Sherwood – Why do we care if our lights have “cut-off”? because sometimes you do meet cars and trucks at night, yes – even on gravel. Maybe you do not. But many will and do.
While commuting is one thing, many of the companies that send us product, yes even commuter bike stuff, want us to test and review in on gravel and off road. If it passes muster than they have an audience that sees that here and, possibly, new buyers. That’s the hope, anyway.
The problem with not being able to see turns is related to the lean into a turn and how the cut-off beam then does not illuminate the entry to the turn, not that it cannot be used to see *around the turn*. Grannygear suggest that a helmet mounted light would alleviate that concern he had, but it is inferred that a typical, non-cutoff beam light would not require that solution, and in my experience, that is correct. Oh…. and I do commute by bicycle a lot at night.
Judging by the reviews on the Outbound site, no one else seems to notice this cutoff problem… However it makes sense and the author does a good job of describing it. For tight twisty fast riding down a mountain road, maybe this isn’t the ideal single light. But for lots of flat commuting I think it might be better than riding with my EVO. Personally I think riding on the road with a helmet light is a good idea anyways because you can turn your head and make sure cars pulling up at intersections see you. It also clearly differentiates you as a cyclist from a moped or motorcycle with their highbeams on to oncoming traffic.
The Evo is freaking awesome btw, for mach-chicken Enduro downhill Strava PRs when the hikers are still in bed sleeping. Also outbounds customer service is FIRST CLASS.
I ride on a commuter bike path before sunrise (especially during the winter). The path is much narrower than the typical street. Many cyclists blind oncoming traffic using powerful MTB lights. My comments to them are generally unprintable.
For this use case horizontal cut-off is essential. I’ve experimented with several lights over the years. The path I ride on is generally totally dark at night so a substantial amount of light is required.
In the end I settled on an Outbound Detour on the bars, combined with a B&M Ixon Rock on the handlebar bag mount. The Rock is more of a spot beam with cut-off so I aim it for longer distances (beyond 50 feet) and use the Outbound for near field lighting.
Seems to work pretty well.