
A Box Full Of Topeak: At The Finish – by Guitar Ted
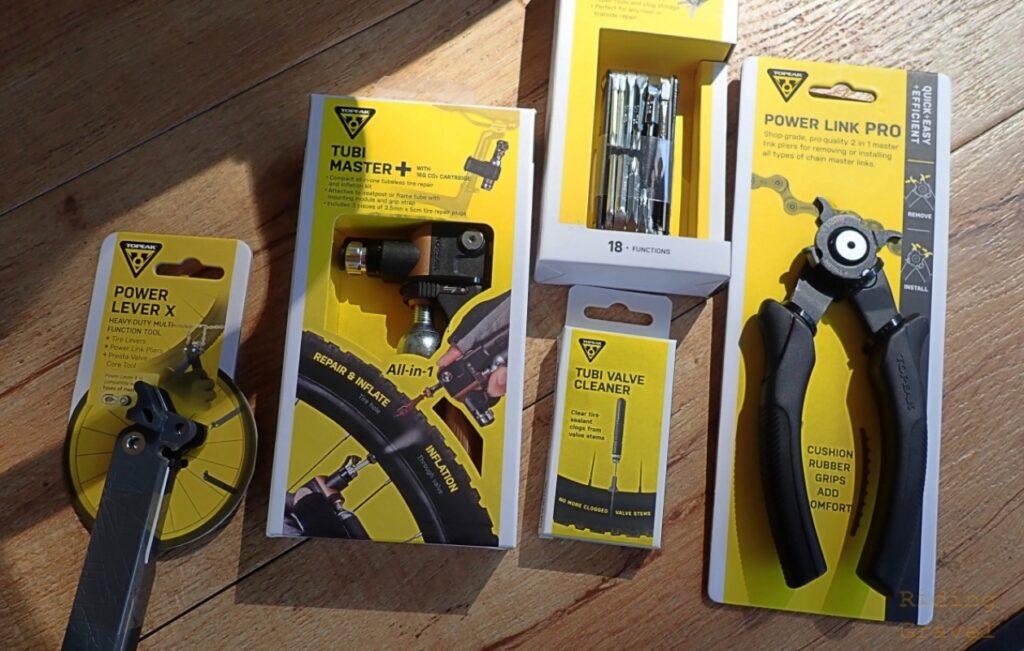
Topeak is a maker of a wide range of products for the cyclist and back in August we got quite a range of products from them. That box was full of stuff ranging from practical tools, to seat packs, to a nifty special tool for tubeless valve stems. After a couple of months of living with this stuff, I have my final verdict on each product ready to go now. The introductory post with specs and prices can be found here.

Tubi 18 Mini-tool: Okay- another multi-tool! What in the world could make this any different than the literally hundreds of other multi-tools out there? Well, the “Tubi” part might tip us off here, as that term, at least in Topeak nomenclature, is reserved for things related to tubeless tire usage. The Tubi 18 Multi-Tool is no different. Topeak cleverly packaged this tool with a slide-out box with the plugs inside. But there is a reamer, an installation tool, and a knife in this multi-tool also. Well thought out! In light of this, I feel like the Tubi 18 replaces a separate tubeless puncture repair tool, and a knife to trim the plug with, which many tubeless repair tools do not have.
This alone would make the Tubi 18 ride to the top of the heap for me, but Topeak also insured that each individual tool is deploy-able without busting off your fingernails, while keeping other tools you don’t want to use from flopping around and getting in the way. A tricky balance for a multi-tool, but Topeak pulls it off here.
At The Finish: Recommended.
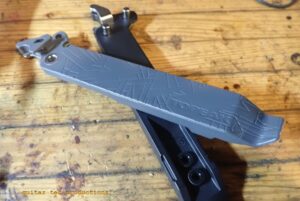
Power Lever X Tool: I’m not going to spend a lot of time on this one because we reviewed it earlier here, but I will say two things- First off, these are really good at being tire levers. The lip design is good and the length of the levers provides the user with great leverage over even the stiffest and toughest tires. The levers are also stiff enough to really allow you to leverage those stubborn tire beads as well. On the “not-so-good” side, I would have preferred that the levers snap and nested together in a more secure way. Overall these are great at being tire levers though.
However; I wasn’t too stoked on the chain quick link connector/disconnection function. The tool has a thicker edge and a thinner edge which makes it fussy to use on a chain. Breaking the link was easier than connecting it. It can be done, and I guess in a pinch, which is what the tool was designed for, it does the job.
At The Finish: Get this if you need burly tire levers with the addition of a bonus chain quick-link tool that might come in handy some day. Skip this if you already have a great quick-link tool and tire lever set.
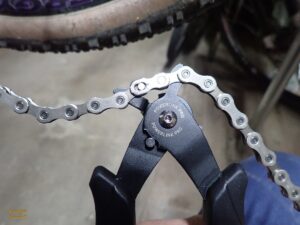
Power Link Pro Tool: This is a “shop level” tool that you’d likely not carry with you on a ride, but you could. I’m looking at this as a home shop tool. The tool has a dual-function installation-removal design that requires the user to reverse the jaws via a sprung hinge. In practice, it is fussy to get the tool to reverse from one way to the other. So, in theory, while it can do both installation and removal of a quick link, it isn’t an easy process to set up the tool to do the task.
I found disconnecting a quick link was easy. But when I tried using this tool to connect one of those notoriously stubborn Shimano quick links, it came up short. Short as in not enough travel built into the design to snap the link into place short.
At The Finish: Since the tool’s dual functionality is so fussy to implement, and with the experience I had with connecting a quick link being one that fell a bit short, I would not recommend this tool. The ubiquitous Park Tools MLP-1.2 choice, or the excellent Shimano CL-CN10 quick link tools are far better choices here for the home shop. (Note: I’m sure there are others as well)

Tubi Master+ Tool With 16gm Cartridge: Here is something I rarely, if ever, need to use, so this one is kind of a speculative review, in terms of usage. I can say that this set up looked pro and it never got in my way strapped to the seat post on a couple of my bicycles. It is easily swapped from bike-to-bike, by the way.
Looking at how Topeak designed the tool, looking at how it is made, and from how that rides on a bike, well I would say this is a smart, if not minimalist set up.
At The Finish: Recommended for a complete, quick, minimalist set up that stays where you strap it on to your bicycle.
Tubi Valve Cleaner: I liked this tool very much. However, due to its form-factor, it is easy to misplace and lose, and I did just that. Too bad. It was kinda cool…..
But when a practically minded person sets their thoughts on what this tool did, I’m sure that they could come up with something around the home to do a similar job. (Pipe cleaner? Bobby pin? Cue tip and alcohol?) Sooooo…..
At The Finish: Cool tool, but for fifteen bucks, and seeing how easily it can find its way into the swirling mass of detritus in my shop, I’d find something else do do this job.
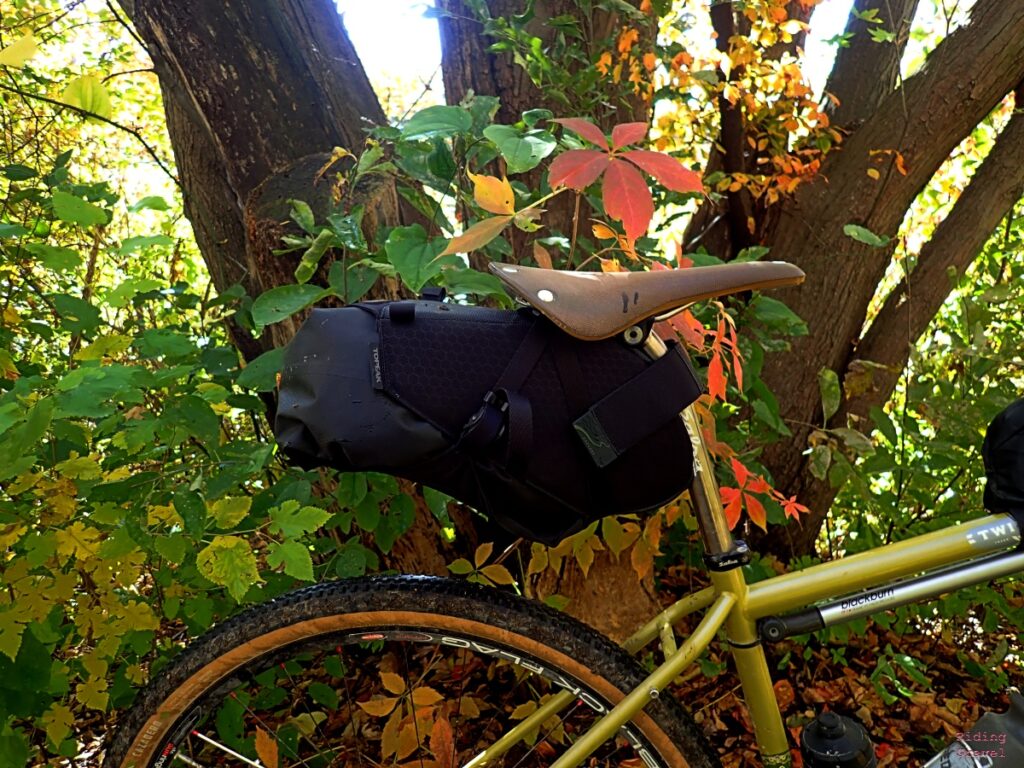
Backloader X Seat Bags: Okay, last, but certainly not least, the star of this show, the Topeak Backloader seat packs. I found these to be winners in every way.

N.Y.Roll, my co-host on the “Riding Gravel Radio Ranch Podcast“, received the 15L bag while I used the 10L one. In our testing, we were delighted with several things about these bags. First, they are very stable. I think the holster design has a lot to do with that. You strap the bag on once, and then you don’t need to fuss with that bit of the bag again. Removal of the dry bag portion is simply a buckle undone and boom! Your cargo can be transported to your bench, campsite, office, or into a store.
I used the one I had for commutes and had it filled most often with clothing. Rain gear and cold weather jackets specifically. N.Y. Roll did a test with heavier objects and found no reasons for worry in terms of swaying, or sagging. My single track outings showed the bag to be nearly invisible off the back of the bike.
At The Finish: If I had one complaint it would be that the strap to attach a rear blinkie is useless unless the bag is nearly full. Otherwise, no complaints from us. Recommended.
Note: Riding Gravel received these Topeak products from a distributor for test and review. We are not being paid nor bribed for this review and we strive to give our honest thoughts and views throughout.


1 thought on “A Box Full Of Topeak: At The Finish”